Why IBM is tripling its cloud data center capacity in the UK

The need for cloud data centers in Europe continues to grow.
UK cloud adoption rates have increased to 84 percent over the last five years, according to Cloud Industry Forum.
That’s why I am thrilled to announce a major expansion of IBM UK cloud data centers, tripling the capacity in the United Kingdom to meet this growing customer demand. The investment expands the number of IBM cloud data centers in the country from two to six.

It is the largest commitment IBM Cloud has made to one country at one time. Expanding the cloud data center foot print in UK that has started over five years ago, IBM will have more UK data centers than any other vendor.
Meeting demand in highly regulated industries
Highly regulated industries, such as the public sector and financial services, have nuanced and sensitive infrastructure and security needs.
The UK government&;s Digital Transformation Plan to boost productivity has put digital technologies at the heart of the UK&8217;s economic future.
The Government Digital Service (GDS) leading the digital transformation of government, runs GOV.UK, helping millions of people find the government services and information they need every day. To make public services simpler, better and safer, the UK&8217;s national infrastructure and digital services require innovative solutions, strong cyber security defenses and high availability platforms. is thus essential to embrace the digital intelligence that will deliver outstanding services to UK citizens.
In response, IBM is further building out its capabilities through its partnership with Ark Data Centres, the majority owner in a joint venture with the UK government. Together, we’re delivering public data center services that are already being used at scale by high-profile, public-sector agencies.
It is all about choice
The IBM point of view is to design a cloud that brings greater flexibility, transparency and control over how clients manage data, run businesses and deploy IT operations.
Hybrid is the reality of cloud migration. Clients don’t want to move everything to the public cloud or keep everything in the private cloud. They want to have a choice.
For example, IBM offers the opportunity to keep data local in client locations to those enterprises with fears about data residency and compliance with regulations for migration of sensitive workloads. Data locality is certainly a factor for European businesses, but even more businesses want the ability to move existing workloads to the cloud and provide cognitive tools and services that allow them to fuel new cloud innovations.
From cost savings to innovation platform
Data is the game changer in cloud.
IBM is optimizing its cloud for data and analytics, infused with services including Watson, blockchain and Internet of Things (IoT) so that clients can take advantage of higher-value services in the cloud. This is not just about storage and compute. If clients can’t analyze and gain deeper insights from the data they have in the cloud, they are not using cloud technology to its full potential.
Besides, our customers are focusing more and more on value creation and innovation. That&8217;s why travel innovators are adopting IBM Cloud, fueled by Watson&8217;s cognitive intelligence, to transform interactions with customers and speed the delivery of new services.
Thomson, part of TUI UK & Ireland, one of the UK’s largest travel operators, taps into one of IBM’s UK cloud data centers to run its new tool developed in IBM’s London Bluemix Garage. The app uses Watson APIs such as Conversation, Natural Language Classifier and Elasticsearch on Bluemix to enable customers to receive holiday destination matches based on natural language requests like &;I want to visit local markets” or “I want to see exotic animals.&;
Other major brands, including Dixons Carphone, National Express, National Grid, Shop Direct, Travis Perkins PLC, Wimbledon, Finnair, EVRY and Lufthansa, are entrusting IBM Cloud to transform their business to create more seamless, personalized experiences for customers and accelerate their digital transformation.
By the end of 2017, IBM will have 16 fully operational cloud data centers across Europe, representing the largest and most comprehensive European cloud data center network. Overall, IBM has now the largest cloud data center footprint globally with more than 50.
These new IBM Cloud data centers will help businesses in industries such as retail, banking, government and healthcare meet customer needs.
The post Why IBM is tripling its cloud data center capacity in the UK appeared first on Cloud computing news.
Quelle: Thoughts on Cloud

Best practices for running RabbitMQ in OpenStack

The post Best practices for running RabbitMQ in OpenStack appeared first on Mirantis | The Pure Play OpenStack Company.
OpenStack is dependent on message queues, so it&;s crucial that you have the best possible setup. Most deployments include RabbitMQ, so let&8217;s take a few minutes to look at best practices for making certain it runs as efficiently as possible.
Deploy RabbitMQ on dedicated nodes
With dedicated nodes, RabbitMQ is isolated from other CPU-hungry processes, and hence can sustain more stress.
This isolation option is available in Mirantis OpenStack starting from version 8.0. For more information, do a search for ‘Detach RabbitMQ’ on the validated plugins page.
Run RabbitMQ with HiPE
HiPE stands for High Performance Erlang. When HiPE is enabled, the Erlang application is pre-compiled into machine code before being executed. Our benchmark showed that this gives RabbitMQ a performance boost up to 30%. (If you&8217;re into that sort of thing, you can find the benchmark details here and the results are here.)
The drawback with doing things this way is that application initial start time increases considerably while the Erlang application is compiled. With HiPE, the first RabbitMQ start takes around 2 minutes.
Another subtle drawback we have discovered is that if HiPE is enabled, debugging RabbitMQ might be hard as HiPE can spoil error tracebacks, rendering them unreadable.
HiPE is enabled in Mirantis OpenStack starting with version 9.0.
Do not use queue mirroring for RPC queues
Our research shows that enabling queue mirroring on a 3-node cluster makes message throughput drop twice. You can see this effect in publicly available data produced by Mirantis Scale team &; test reports.
On the other side, RPC messages become obsolete pretty quickly (1 minute) and if messages are lost, it leads only to failure of current operations in progress, so overall RPC queues without mirroring seem to be a good tradeoff.
At Mirantis, you generally enable queue mirroring only for Ceilometer queues, where messages must be preserved. You can see how we define such a RabbitMQ policy here.
The option to turn off queue mirroring is available in MOS starting in Mirantis OpenStack 8.0 and is enabled by default for RPC queues starting in version 9.0.
Use a separate RabbitMQ cluster for Ceilometer
In general, Ceilometer doesn&8217;t send many messages through RabbitMQ. But if Ceilometer gets stuck, its queues overflow. That leads to RabbitMQ crashing, which in turn causes outages for other OpenStack services.
The ability to use a separate RabbitMQ cluster for notifications is available starting with OpenStack Mitaka (MOS 9.0) and is not supported in MOS out of the box. The feature is not documented yet, but you can find the implementation here.
Reduce Ceilometer metrics volume
Another best practice when it comes to running RabbitMQ beneath OpenStack is to reduce the number of metrics sent and/or their frequency. Obviously that reduces stress put on RabbitMQ, Ceilometer and MongoDB, but it also reduces the chance of messages piling up in RabbitMQ if Ceilometer/MongoDB can&8217;t cope with their volume. In turn, messages piling up in a queue reduce overall RabbitMQ performance.
You can also mitigate the effect of messages piling up by using RabbitMQ’s lazy queues feature (available starting with RabbitMQ 3.6.0), but as of this writing, MOS does not make use of lazy queues..
(Carefully) consider disabling queue mirroring for Ceilometer queues
In the Mirantis OpenStack architecture, queue mirroring is the only ‘persistence’ measure used. We do not use durable queues, so do not disable queue mirroring if losing Ceilometer notifications will hurt you. For example, if notification data is used for billing, you can&8217;t afford to lose those notifications.
The ability to disable mirroring for Ceilometer queues is available in Mirantis OpenStack starting with version 8.0, but it is disabled by default.
So what do you think?  Did we leave out any of your favorite tips? Let us know in the comments!
The post Best practices for running RabbitMQ in OpenStack appeared first on Mirantis | The Pure Play OpenStack Company.
Quelle: Mirantis

OpenStack Developer Mailing List Digest November 5-18

SuccessBot Says

mriedem: We’re now running neutron by default in Ocata CI jobs [1].
stevemar: fernet token format is now the default format in keystone! thanks lbragstad samueldmq and dolphm for making this happen!
Ajaegar: developer.openstack.org is now hosted by OpenStack infra.
Tonyb: OpenStack requirements on pypi [2] is now a thing!
All

Registration Open For the Project Teams Gathering

The first OpenStack Project Teams Gathering event geared toward existing upstream team members, providing a venue for those project teams to meet, discuss and organize the development work for the Pike release.
Where: Atlanta, GA
When: The week of February 20, 2017
Register and get more info [3]
Read the FAQ for any questions. If you still have questions, contact Thierry (ttx) over IRC on free node, or email foundation staff at ptg@openstack.org.
Full thread

Follow up on Barcelona Review Cadence Discussions

Summary of concerns were Nova is a complex beast. Very few people know even most of it well.
There are areas in Nova where mistakes are costly and hard to rectify later.
Large amount of code does not merge quickly.
Barrier of entry for Nova core is very high.
Subsystem maintainer model has been pitched [4].
Some believe this is still worth giving a try again in attempt to merge good code quickly.
Nova today uses a list of experts [5] to sign off on various changes today.
Nova PTL Matt Riedemann’s take:

Dislikes the constant comparison of Nova and the Linux kernel. Lets instead say all of OpenStack is the Linux Kernel, and the subsystems are Nova, Cinder, Glance, etc.
The bar for Nova core isn’t as high as some people make it out to be:

Involvement
Maintenance
Willingness to own and fix problems.
Helpful code reviews.

Good code is subjective. A worthwhile and useful change might actually break some other part of the system.

Nova core Jay Pipes is supportive of the proposal of subsystems, but with a commitment to gathering data about total review load, merge velocity, and some kind of metric to assess code quality impact.
Full thread

Embracing New Languages in OpenStack

Technical Committee member Flavio Percoco proposes a list of what the community should know/do before accepting a new language:

Define a way to share code/libraries for projects using the language

A very important piece is feature parity on the operator.
Oslo.config for example, our config files shouldn&;t change because of a different implementation language.
Keystone auth to drive more service-service interactions through the catalog to reduce the number of things an operator needs to configure directly.
oslo.log so the logging is routed to the same places and same format as other things.
oslo.messaging and oslo.db as well

Work on a basic set of libraries for OpenStack base services
Define how the deliverables are distributed
Define how stable maintenance will work
Setup the CI pipelines for the new language

Requirements management and caching/mirroring for the gate.

Longer version of this [6].

Previous notes when the Golang discussion was started to work out questions [7].
TC member Thierry Carrez says the most important in introducing the Go should not another way for some of our community to be different, but another way for our community to be one.
TC member Flavio Percoco sees part of the community wide concerns that were raised originated from the lack of an actual process of this evaluation to be done and the lack of up front work, which is something trying to be addressed in this thread.
TC member Doug Hellmann request has been to demonstrate not just that Swift needs Go, but that Swift is willing to help the rest of the community in the adoption.

Signs of that is happening, for example discussion about how oslo.config can be used in the current version of Swift.

Flavio has started a patch that documents his post and the feedback from the thread [8]
Full thread

API Working Group News

Guidelines that have been recently merged:

Clarify why CRUD is not a great descriptor [9]
Add guidelines for complex queries [10]
Specify time intervals based filtering queries [11]

Guidelines currently under review:

Define pagination guidelines [12]
WIP add API capabilities discovery guideline [13]
Add the operator for “not in” to the filter guideline [14]

Full thread

OakTree &; A Friendly End-user Oriented API Layer

The OpenStack summit results of the Interop Challenge shown on stage was awesome. 17 different people from 17 different clouds ran the same workload!
One of the reasons it worked is because they all used the Ansible modules we wrote based on the Shade library.

Shade contains business logic needed to hide vendor difference in clouds.
This means that there is a fantastic OpenStack interoperability story &8211; but only if you program in Python.

OakTree is a gRPC-based APO service for OpenStack that is based on the Shade library.
Basing OakTree on Shade gets not only the business logic, Shade understands:

Multi-cloud world
Caching
Batching
Thundering herd protection sorted to handle very high loads efficiently.

The barrier to deployers adding it to their clouds needs to be as low as humanly possible.
Exists in two repositories:

openstack/oaktree [15]
openstack/oaktreemodel [16]

OakTree model contains the Protobuf definitions and build scripts to produce Python, C++ and Go code from them.
OakTree itself depends on python OakTree model and Shade.

It can currently list and search for flavors, images, and floating ips.
A few major things that need good community design listed in the todo.rst [17]

Full thread

 
Quelle: openstack.org

Three Considerations for Planning your Docker Datacenter Deployment

Congratulations! You&;ve decided to make the change your application environment with Docker Datacenter. You&8217;re now on your way to greater agility, portability and control within your environment. But what do you need to get started? In this blog, we will cover things you need to consider (strategy, infrastructure, migration) to ensure a smooth POC and migration to production.
1. Strategy
Strategy involves doing a little work up-front to get everyone on the same page. This stage is critical to align expectations and set clear success criteria for exiting the project. The key focus areas are to determining your objective, plan out how to achieve it and know who should be involved.
Set the objective &; This is a critical step as it helps to set clear expectations, define a use case and outline the success criteria for exiting a POC. A common objective is to enable developer productivity by implementing a Continuous Integration environment with Docker Datacenter.
Plan how to achieve it &8211; With a clear use case and outcome identified, the next step is to look at what is required to complete this project. For a CI pipeline, Docker is able to standardize the development environment, provide isolation of the applications and their dependencies and eliminate any &;works on my machine&; issues to facilitate the CI automation. When outlining the plan, make sure to select the pilot application. The work involved will vary depending on whether it is a legacy application refactoring or new application development.
Integration between source control and CI allows Docker image builds to be automatically triggered from a standard Git workflow.  This will drive the automated building of Docker images. After Docker images are built they are shipped to the secure Docker registry to store them (Docker Trusted Registry) and role based access controls enable secure collaboration. Images can then be pulled and deployed across a secure cluster as running applications via the management layer of Docker Datacenter (Universal Control Plane).
Know who should be involved &8211; The solution will involve multiple teams and it is important to include the correct people early to avoid any potential barriers later on. These teams can include the following teams, depending on the initial project: development, middleware, security, architects, networking, database, and operations. Understand their requirements and address them early and gain consensus through collaboration.
PRO TIP &8211; Most first successes tend to be web applications with some sort of data tier that can either utilize traditional databases or be containerized with persistent data being stored in volumes.
 
2. Infrastructure
Now that you understand the basics of building a strategy for your deployment, it’s time to think about infrastructure.  In order to install Docker Datacenter (DDC) in a highly available (HA) deployment, the minimum base infrastructure is six nodes.  This will allow for the installation of three UCP managers and three DTR replicas on worker nodes in addition to the worker nodes where the workloads will be deployed. An HA set up is not required for an evaluation but we recommend a minimum of 3 replicas and managers for production deployments so your system can handle failures.
PRO TIP &8211; A best practice is to not deploy and run any container workloads on the UCP managers and DTR replicas. These nodes perform critical functions within DDC and are best if they only run the UCP or DTR services.
Nodes are defined as cloud, virtual or physical servers with Commercially Supported (CS) Docker Engine installed as a base configuration.
Each node should consist of a minimum of:

4GB of RAM
16GB storage space
For RHEL/CentOS with devicemapper: separate block device OR additional free space on the root volume group should be available for Docker storage.
Unrestricted network connectivity between nodes
OPTIONAL Internet access to Docker Hub to ease the initial downloads of the UCP/DTR and base content images
Installed with Docker supported operating system 
Sudo access credentials to each node

Other nodes may be required for related CI tooling. For a POC built around DDC in a HA deployment with CI/CD, ten nodes are recommended. For a POC built around DDC in a non-HA deployment with CI/CD, five nodes are recommended.
Below are specific requirements for the individual components of the DDC platform:
Universal Control Plane

Commercially Supported (CS) Docker Engine must be used in conjunction with DDC.
TCP Load balancer should be available for UCP in an HA configuration.
A valid DNS entry should be created for the load balancer VIP.
SSL certificate from a trusted root CA should be created (a self-signed certificate is created for UCP and may be used but additional configuration is required).
DDC License for 30 day trial or annual subscription must be obtained or purchased for the POC.

Docker Trusted Registry

Commercially Supported (CS) Docker Engine must be used in conjunction with DDC.
TCP Load balancer should be available for DTR in an HA configuration.
A valid DNS entry should be created for the load balancer VIP.
Image Storage options include a clustered filesystem for HA or blob storage (AWS S3, Azure, S3 compatible storage, or OpenStack Swift)
SSL certificate from a trusted root CA should be created (a self-signed certificate is created for DTR and may be used but additional configuration is required).
LDAP/AD is available for authentication; managed built-in authentication can also be used but requires additional configuration
DDC License for 30 day trial or annual subscription must be obtained or purchased for the POC.

The POC design phase is the ideal time to assess how Docker Datacenter will integrate into your existing IT infrastructure, from CI/CD, networking/load balancing, volumes for persistent data, configuration management, monitoring, and logging systems. During this phase, understand how  how the existing tools fit and discover any  gaps in your tooling. With the strategy and infrastructure prepared, begin the POC installation and testing. Installation docs can be found here.
 
3. Moving from POC Into Production
Once you have the built out your POC environment, how do you know if it’s ready for production use? Here are some suggested methods to handle the migration.

Perform the switchover from the non-Dockerized apps to Docker Datacenter in pre-production environments. Have Dev, Test, and Prod environments, switchover Dev and/or Test and run through a set burn in cycle to allow for the proper testing of the environment to look for any unexpected or missing functionality. Once non-production environments are stable, switch over to the production environment.

Start integrating Docker Datacenter alongside your existing application deployments. This method requires that the application can run with multiple instances running at the same time. For example, if your application is fronted by a load balancer, add the Dockerized application to the existing load balancer pool and begin sending traffic to the application running in Docker Datacenter. Should issues arise, remove the Dockerized application running  from the load balancer pool until issues can be resolved.

Completely cutover to a Dockerized environment all in one go. As additional applications begin to utilize Docker Datacenter, continue to use a tested pattern that works best for you to provide a standard path to production for your applications.

We hope these tips, learned from first hand experience with our customers help you in planning for your deployment. From standardizing your application environment and simultaneously adding more flexibility for your application teams, Docker Datacenter gives you a foundation to build, ship and run containerized applications anywhere.

3 Considerations for a successful deployment Click To Tweet

Enjoy your Docker Datacenter POC

Get started with your Docker Datacenter POC
See What’s New in Docker Datacenter
Learn more by visiting the Docker Datacenter webpage
Sign up for a free 30 day trial

The post Three Considerations for Planning your Docker Datacenter Deployment appeared first on Docker Blog.
Quelle: https://blog.docker.com/feed/

8 steps to help your organization enter the cloud

Say you&;re a CIO or CTO who wants to make a fundamental shift in how digital technology can drive your enterprise to innovate and produce transformational business outcomes. Say you know how it can change not just the operations of your business, but its culture as well.
In essence, you&8217;re ready to enter the cloud.
As I talk to clients who are at this stage of their cloud journey, the big question then becomes, &;How?&;
Certainly cloud architecture, process and functionality are important ingredients for success, but consider stepping back and looking at the big picture. After all, you&8217;re making a fundamental shift in your enterprise. You want to ensure that cloud can support your business mission and one way to ensure that is to develop a cloud implementation strategy.
How do you form that strategy? At IBM, we&8217;re fond of the word “think,” and through our work with the research analysis firm Frost and Sullivan, we&8217;ve come up with some ways to help think through and plan your cloud journey:
1. Educate your IT team.
Make sure your team understands that moving to cloud technology is not outsourcing or a way to cut jobs, but rather an opportunity. By shifting the &8220;grunt work&8221; of infrastructure deployment and maintenance to a cloud provider, it will free up IT professionals to participate in more strategic work.
2. Make it “cloud first” for any new projects.
This simply means that when your business needs a new application, start by considering cloud-based solutions. With a &8220;cloud first&8221; policy, corporate developers become champions of strategy and heroes to their line of business colleagues.
3. Move test and development to the public cloud.
On-demand access to scalable resources and pay-as-you-go pricing enable developers to test, replicate, tweak, and test again in an environment that replicates the production environment. This simple move will free up hundreds of hours of IT operational resources to work on the cloud or other strategic projects.
4.  Review your IT maintenance schedule.
Check for planned hardware and software upgrades and refreshes. Major upgrades can be disruptive to users, as well as costly and time-consuming to implement. Where possible, you should synchronize planned upgrades with your cloud project. In some cases, you may decide that certain workloads should remain in your on-premises data center for the time being.
5. Organize a cross-functional project planning team.
Identify workloads to migrate. This is your opportunity to gain the trust of line-of-business managers who, in many companies, consider IT a roadblock. The term &8220;fast solutions&8221; will play very well to this audience.
6. Hire an expert provider to spearhead the project.
In setting out to build their cloud strategies, most businesses face two handicaps: a lack of expertise and few resources to spare. An outside expert can assist with tasks from risk assessment, to strategy development, to project planning, to management of the migration project. But remember, your provider should focus on a successful business outcome, not just a &8220;tech flash-cut.&8221;
7. Plan your ongoing cloud support needs.
The time to consider how you will manage your cloud is now, before you start moving strategic workloads. While you may be at the beginning of your cloud journey, you should look ahead to the inevitable time when the majority of workloads will be cloud-delivered. You may want to consider one of the few cloud service providers to offer a managed-service option.
8. Build your migration and integration project plan.
This is the essential on-ramp to your company’s cloud journey. Work with your experts and cross-functional team to identify two or three simple, low-risk workloads to move to the cloud. For most enterprises, the best bets are web-enabled workloads that are neither critical, nor strategic to the running of the business, and that require limited interaction with external data sources.
Those are the essentials. Use them to achieve your &8220;digital revolution.&8221;
To learn more, read “Stepping into the Cloud: A Practical Guide to Creating and Implementing a Successful Cloud Strategy.”
Image via FreeImages.com/Stephen Calsbeek
The post 8 steps to help your organization enter the cloud appeared first on news.
Quelle: Thoughts on Cloud

Get to Know the Docker Datacenter Networking Updates

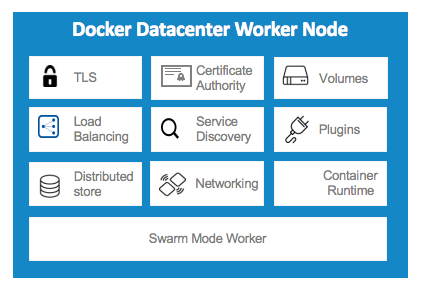
The latest release of Docker Datacenter (DDC) on Docker Engine 1.12 brings many new networking features that were designed with service discovery and high availability in mind. As organizations continue their journey towards modernizing legacy apps and microservices architectures, these new features were created to address modern day infrastructure demands. DDC builds on and extends the built-in orchestration capabilities including declarative services, scheduling, networking and security features of Engine 1.12. In addition to these new features, we published a new Reference Architecture to help guide you in designing and implementing this for your unique application requirements.

Among the new features in DDC are:

DNS for service discovery
Automatic internal service load balancing
Cluster-wide transport-layer (L4) load balancing
Cluster-wide application-layer (L7) load balancing using the new HTTP Routing Mesh (HRM) experimental feature

 
When creating a microservice architecture where services are often decoupled and communicated using APIs, there is an intrinsic need for many of these services to know how to communicate with each other. If a new service is created, how will it know where to find the other services it needs to communicate with? As a service needs to be scaled, what mechanism can be used for the additional containers to be added to a load balancer pool? DDC ships with the tools that tackle these challenges and enable engineers to deliver software at the pace of ever shifting business needs.
As services are created in DDC, the service name registers in a DNS resolver for each docker network. Each service will register in the Docker DNS resolver and can be reached from other applications on the same network by its service name. DNS works well for service discovery; it requires minimal configuration and can integrate with existing systems since the model has existed for decades.
It&;s also important for services to remain highly available after they discover each other. What good is a newly discovered service if you can&8217;t reach the API that developers labored over for weeks? I think we all know the answer to that, and it&8217;s a line in an Edwin Starr song (Hint: Absolutely nothing). There are a few new load balancing features introduced in DDC that are designed to always keep your services accessible. When services register in DNS, they are automatically assigned a Virtual IP (VIP). Internal requests pass through the VIP and then are load balanced. Docker handles the distribution of traffic among each healthy service task.
 
There are two new ways to load balance applications externally into a DDC managed cluster: the Swarm Mode Routing Mesh and the experimental HTTP Routing Mesh (HRM).

The Swarm Mode Routing Mesh works on the transport-layer (L4) where the admin assigns a port to a service (8080 in the example below) and when the external web traffic comes to the port on any host, the Routing Mesh will route the traffic onto any host that is running a container for that service. With Routing Mesh, the host that accepts the incoming traffic does not need to have the service running on it.
The HTTP Routing Mesh works on the application-layer (L7) where the admin assigns a label to the service that corresponds to the host address. The external load balancer routes the hostnames to the nodes and the Routing Mesh send the traffic across the nodes in the cluster to the correct containers for the service.

These offer multiple options to load balance and keep your application highly available

Finally, while it&8217;s important to keep your services highly available, it&8217;s also important for the management of your cluster to be highly available. We improved the API health checks for Docker Trusted Registry (DTR) so that a load balancer can easily be placed in front of all replicas in order to route traffic to healthy instances.  The new health check API endpoint is /health and you can set a HTTPS check from your load balancer to the new endpoint to ensure high availability of DTR.
 

There is a new Reference Architecture available with more detailed information on load balancing with Docker Datacenter and Engine 1.12.  Additionally because DDC is backwards compatible for applications built with previous versions of Docker Engine (1.11 and 1.10 using Docker Swarm 1.2), both the new Routing Mesh and Interlock based load balancing and service discovery are supported in parallel on the same DDC managed cluster. For your applications built with previous versions of Engine, a Reference Architecture for Load Balancing and Service Discovery with DDC + Docker Swarm 1.2 is also available.

New networking features plus Reference ArchitectureClick To Tweet

More Resources:

Read the latest RA: Docker UCP Service Discovery and Load Balancing
See What’s New in Docker Datacenter
Learn more by visiting the Docker Datacenter webpage
Sign up for a free 30 day trial

The post Get to Know the Docker Datacenter Networking Updates appeared first on Docker Blog.
Quelle: https://blog.docker.com/feed/

Barcelona Summit Notes: OpenStack Security on Track

Barcelona Summit Notes: OpenStack Security on Track

The post Barcelona Summit Notes: OpenStack Security on Track appeared first on Mirantis | The Pure Play OpenStack Company.
This is a brief overview of the Security track at OpenStack Summit Barcelona. Spend just five minutes and keep up with the state of security developments.

Holistic Security for OpenStack Clouds
The security track started on Wednesday with ‘Holistic Security for OpenStack Clouds’ by Major Hayden, principal architect at Rackspace, where he said that ‘Securing OpenStack can feel like taking a trip to the Upside Down’.
He suggested that to cope with the challenge of securing complex systems, you need to follow the holistic approach. Don&;t just secure the outer perimeter with an expensive firewall with ‘laser beams’, but also provide small security improvements at multiple layers, both inside and outside the perimeter.

In particular, Major recommended separating the control plane, hypervisors, and tenants’ infrastructure by setting up the trust boundaries for traffic traveling between these three, for example by enabling SELinux and AppArmor on hypervisors.
The advice given by Major regarding control plane security includes:

Monitoring messaging and database performance to look for anomalies or unauthorized access
Using unique credentials for RabbitMQ and for each database
Limiting communication between OpenStack services using, for example, iptables
Giving each service a different keystone account with different credentials
Monitoring for high bandwidth usage and high connection counts

You can find more OpenStack security recommendations in Mirantis Security Best Practices.
Advanced Threat Protection and Kubernetes
Intel, along with Midokura and Forcepoint, presented the use case of bringing advanced threat protection to Kubernetes. The solution uses the OpenStack Kuryr project to redirect traffic from Neutron-managed networks to security Pods for inspection using Neutron&8217;s service-chaining.
ACL is not Security
During the security part of the talk, Forcepoint pointed out that ‘ACL is not security’ and L4-L7 inspection is needed to catch the targeted attacks, for example, because targeted attacks proliferate across the networks by infecting one machine or network after another, gaining privileges and acting as an internal entity allowed by ACLs and bypassing firewalls.

The demo showed the shellshock attack on the vulnerable Web server run as a k8s Pod being blocked by the preconfigured containerized NGFW by Forcepoint. To send the packets from the Neutron network to the NGFW virtual service, the Intel Open Security Controller calls the Neutron API to redirect packets through Kuryr to the k8s security container. Intel Open Security Controller now has basic Kubernetes support highlighted in the demo by Manish Dave, Platform Architect from Intel, in addition to OpenStack support, which was presented in Tokyo a year ago.

Watch on YouTube: https://www.youtube.com/watch?v=5b8jYYS389g
Container Security and CIA
If the previous talk was about security on containers, the next one was about security of the container itself, presented by Scott McCarty, Senior Strategist from Red Hat, who looked into container security from the perspective of CIA (confidentiality, integrity, and availability).
He started this talk with a vivid example from his life of how his house had been robbed and what measures he took to protect his valuables in the future, trying to explain how much security is enough when managing risks.
The one risk with containers is that despite the fact that they leverage OS processes isolation, they still share the same kernel, which can be exploited to elevate privileges. Isolation is still one of the main concerns when creating secure infrastructure. Another container content that needs verification and validation before going to production.
Scott showed how you can run, for example, a read-only container with enabled SELinux that limits access to the container’s data so that it&8217;s available only for the process of running the container.

Watch on YouTube: https://www.youtube.com/watch?v=wKT191Ak9fA
Incident Response and Anomaly Detection
Grant Murphy, Security Architect from IBM, showed a good demo in his talk “Incident Response and Anomaly Detection Using Osquery”, during which he ran a malware sample that was a simple remote shell. That demo backdoor adds a reference to crontab to download itself to be persistent, establishes a connection to a remote server, and removes its executable from disk. In the demo, Grant showed how to trace all these activities with the help of simple SQL-style requests by osquery. Next, he showed how to configure osquery for OpenStack and query information from running OpenStack services. Osquery, in fact, has many features for monitoring, auditing, and intrusion detection with support for Yara rules, and is used by Facebook, Airbnb, Git, and Heroku.

Watch on YouTube: https://www.youtube.com/watch?v=5b8jYYS389g
Cloud Forensics vs. OpenStack
Incident response in the cloud was also in the focus of the  “Cloud Forensics vs. OpenStack” panel where experts Kim Hindart, CSO of City Network, Anders Carlsson, forensic expert from BTH, and the author of this article discussed the issues related to digital forensics in the cloud. One thing we discussed is comprehensive logging enablement as a way to mitigate a repudiation attack and find the traces of the attacker when an incident happens. For example, it is recommended to log both successful and unsuccessful login attempts. While the second ones may indicate a brute-force attack, the first ones can point to elevation of privileges that result from compromised credentials.
Another highlighted issue was exfiltrating digital evidence in a multi-tenant environment. For example, accessing Compute node logs that represent digital evidence may lead to confidentiality violations if the node includes additional tenants who are not related to the incident.
The OpenStack forensic tool (FROST) was the first and only attempt to create a forensic data acquisition solution. Introduced in 2013, it unfortunately has not gained support.
At the end of the panel, experts gave recommendations on how to prepare your organization for the inevitable security attack, with the consensus being that the best way to handle an incident is to prevent or block the attack at the very beginning, thus, simplifying the investigation process and minimizing losses.

Watch on YouTube: https://www.youtube.com/watch?v=cqZV3k0pUiw
Compliance: The EU General Data Protection Regulation (GDPR) is coming
Kim Hindart from City Network informed the audience that the EU General Data Protection Regulation (GDPR) is coming. Companies based outside the EU that provide services to EU citizens have until the 25th of May 2018 to make their cloud compliant. Otherwise, companies will be penalized with a fine of up to 20,000,000 EUR, or up to 4% of the total worldwide annual turnover.

Watch on YouTube: https://www.youtube.com/watch?v=c-7QQ5Eg__Y
The topic of HIPAA and PCI DSS compliance in OpenStack was also addressed by Blue Box Cloud DevOps. Watch on YouTube: https://www.youtube.com/watch?v=XHFM_1G-Hog
The state of OpenStack security
Robert Clark from IBM, the current PTL of the OpenStack Security project, reported the state of their work, as usual. He started with the Keystone, Barbican (secrets manager), and Castellan (key management interface to enable multiple key managers) projects.

The Threat Analysis process and Syntribos (the fuzzy testing framework for finding vulnerabilities in the API) were the main focus of the presentation, however. For example, Rob introduced the results of the threat analysis process for the Barbican project and ran the demo through SQL injection tests using Syntribos. At the end, he brought up  the idea of a security incubator aimed at assisting small projects in security not necessarily related to OpenStack but primarily applied to or consumed by OpenStack projects.

Watch on YouTube: https://www.youtube.com/watch?v=GvunSafycX8
Secure Image Management Infrastructure
Symantec presented secure image management infrastructure designed to solve the problem of using and updating images that may contain vulnerabilities. At Symantec (as well as at Mirantis), vulnerability scanning is considered an essential part of the image validation process for securing customers&8217; clouds.
The speakers, Brad Pokorny, Timothy Symanczyk, and Richard Gooch, showed the magic of real-time image recovery done by the Dominator image supervisor in response to unsolicited image modification, which in the demo was deletion of files. Dominator initially calculates the hashes of all the files in the image and keeps the golden image in the machine database. Then, if file modification is detected, Dominator immediately recovers modified/deleted files based on the golden image the VM is supposed to have. This helps to mitigate image tampering attacks and keep the integrity of data, configuration files, and applications delivered within the image. For example, it could protect VMs against attacks by cryptolockers &; ransomware that encrypts files to demand a ransom for their recovery, such as Linux.Encoder.1, which attacked Linux Web servers through a vulnerability in the Magento CMS platform.

Watch on YouTube: https://www.youtube.com/watch?v=vuL7in9CxHY
So that&8217;s it for this year. What&8217;s your most important security concern? Let us know in the comments!
The post Barcelona Summit Notes: OpenStack Security on Track appeared first on Mirantis | The Pure Play OpenStack Company.
Quelle: Mirantis

Big Blue is the new-breed mobile platform standard

You may know IBM as an old-school monolithic, institutional giant, but newsflash: IBM is now a giant capable of extreme athleticism, flexibility and efficiency.
Nowhere is that more clear than in the cloud-delivered mobile services space. Mobile applications are the de facto force in the cloud enterprise. Smart executives will place an emphasis on shaping the enterprise using mobile projects as the tip of the spear.
Why does that make IBM a top player in the mobile marketplace?
IBM uses the full depth and breadth of it massive capabilities to provide the most comprehensive suite of services on the market. IBM has adapted to learning from the market and allowing its employees to give the market what it wants. It offers front- to back-end technologies, with built-in analytics and cognitive services on an open source cloud platform, capable of full mobility and API functionality on an unmatched scale.
How can I say this with such assurance? “The Forrester Wave: Mobile Development Platforms, Q4 2016,” Forrester Research Inc., 24 October 2016, listed IBM as a leader in its evaluation, stating, “the MobileFirst Foundation on-premises offering was once the most full-featured of IBM’s solutions, but the Bluemix cloud solution is now functionally equivalent, driving IBM’s move to the Leaders category.”
IBM has pivoted and shifted to the cloud, and it has done so without a great deal of fanfare. More than 5,000 mobile transformation clients have made the leap, thanks to its suite of services.
According to the Forrester report, app developers and delivery professionals “seek development speed, mobile client accelerators, and data normalization.” Likewise, “data acquisition, analytics and future experience support are key differentiators.”
The IBM MDP platform does those things by flipping the switch and turning it on. This is where the long experience and size of IBM benefit the customer.
IBM has developed its cloud platform such that is not only open source, but so functionally capable that mobile development, data acquisition, and analytics tools can be added to an MDP by simply dragging it to the development or production environment.
There are two types of customers in the MDP space: those that want an all-inclusive platform and those that enjoy managing disparate services. IBM offerings are so robust and feature rich, that it can support both customer types and still allow innovation to thrive. An IBM client needn&;t follow some stock template that forces a customer to do something in a manner they&8217;re not comfortable with. I bet you didn&8217;t expect to hear that from an IBMer, did you?
Download a copy of “The Forrester Wave: Mobile Development Platforms, Q4 2016” and find out why the IBM MobileFirst Foundation is a leader in its field.
Or click here to learn more about IBM mobile services.
The post Big Blue is the new-breed mobile platform standard appeared first on news.
Quelle: Thoughts on Cloud

What should operators consider when deploying NFV

The post What should operators consider when deploying NFV appeared first on Mirantis | The Pure Play OpenStack Company.
NFV comes with big promises and one of the key drivers for NFV is to allow operators to rapidly launch and scale new applications. Today, if an operator wants to launch a new application, the process can be rather complex. It requires a lot of preparation and planning as the data center space has to be allocated, specialized servers, networking and storage have to be acquired. It has to be architected for 5 nines of availability plus integrated with other network elements. Given the costs involved in this process, every project is scrutinized by finance departments and this cautious approach leaves very little room for innovation.
In an NFV world, every application is a piece of software that can run on virtualized servers, storage and networks. Keeping the hardware separate from software gives a new level of flexibility. NFV infrastructure is built as a utility, and when it is time to launch new applications, you do not have to worry about such things as finding racks or integrating servers or even the storage. All of this is already provided by NFV and it is just a matter of allocating the right resources.
Additionally, integration becomes easier as networks are virtualized and pre-integrated. This works fine &; as long as the application is simple and not subscriber-aware. If the application is subscriber aware, it needs to integrate with provisioning systems, and for a typical operator this can be a nine- to twelve-month long process that can cost up to a million dollars per integration. Therefore, for subscriber-aware applications, the agility of NFV can be easily lost.
Fortunately, you can recover that agility by using a built-in virtual User Data Repository (vUDR, or Subscriber Data Management as a Service) as part of your NFV infrastructure. reason some of the more forward-looking operators are placing a vUDR as one of the first subscriber-aware applications in the NFV cloud.
There are clear benefits to this approach. Once the vUDR is in place, all subscriber-related information is readily available to applications that want to use it. New applications launched on NFV don&;t need a one-to-one provisioning integration and operators can start enjoying ‘agility’ for subscriber-aware applications too.
Subscriber Data Management (SDM) is a mission critical application. Before any voice connection can be established, any data service accessed, or any message sent, internal systems need to authenticate a subscriber and their device to authorize their request. For a communications network, SDM is the life-giving oxygen &; services simply cannot be offered without authenticating the subscriber. Openwave Mobility vUDR SDM solution has been validated within Mirantis OpenStack environment and deploying it as the first NFV application helps operators maximize the Agility benefit promised by NFV.
Openwave Mobility vUDR is validated with Mirantis Openstack
Openwave Mobility vUDR is the industry’s first NFV-enabled Subscriber Data Management solution, and has been deployed by several tier one operators globally to manage subscriber profile data across voice and data networks.
Openwave Mobility’s cloud-based vUDR goes above and beyond traditional UDR systems.  Built-in federation and replication means that network applications can read and write data from any data center or data silo, and while the NFV infrastructure is typically built using commodity servers that provide 99.9% availability at best, by using proprietary software processes, Openwave Mobility&8217;s vUDR is able to deliver 99.999% (five-nines) availability on commodity virtual machines.  vUDR is nevertheless lightweight and agile, and it has enabled our customers to on-board new applications in just two weeks, compared to the average subscriber data provisioning integration that can take nine months.
Openwave Mobility’s vUDR, has been validated within the Mirantis OpenStack environment. It provides the crucial SDM element for NFV clouds so that operators who deploy it can truly realize the agility that NFV promises.
The post What should operators consider when deploying NFV appeared first on Mirantis | The Pure Play OpenStack Company.
Quelle: Mirantis

Creating and accessing a Kubernetes cluster on OpenStack, part 3: Run the application

The post Creating and accessing a Kubernetes cluster on OpenStack, part 3: Run the application appeared first on Mirantis | The Pure Play OpenStack Company.
Finally, you&;re ready to actually interact with the Kubernetes API that you installed. The general process goes like this:

Define the security credentials for accessing your applications.
Deploy a containerized app to the cluster.
Expose the app to the outside world so you can access it.

Let&8217;s see how that works.
Define security parameters for your Kubernetes app
The first thing that you need to understand is that while we have a cluster of machines that are tied together with the Kubernetes API, it can support multiple environments, or contexts, each with its own security credentials.
For example, if you were to create an application with a context that relies on a specific certificate authority, I could then create a second one that relies on another certificate authority. In this way, we both control our own destiny, but neither of us gets to see the other&8217;s application.
The process goes like this:

First, we need to create a new certificate authority which will be used to sign the rest of our certificates. Create it with these commands:
$ sudo openssl genrsa -out ca-key.pem 2048
$ sudo openssl req -x509 -new -nodes -key ca-key.pem -days 10000 -out ca.pem -subj “/CN=kube-ca”

At this point you should have two files: ca-key.pem and ca.pem. You&8217;ll use them to create the cluster administrator keypair. To do that, you&8217;ll create a private key (admin-key.pem), then create a certificate signing request (admin.csr), then sign it to create the public key (admin.pem).
$ sudo openssl genrsa -out admin-key.pem 2048
$ sudo openssl req -new -key admin-key.pem -out admin.csr -subj “/CN=kube-admin”sudo openssl x509 -req -in admin.csr -CA ca.pem -CAkey ca-key.pem -CAcreateserial -out admin.pem -days 365

Now that you have these files, you can use them to configure the Kubernetes client.
Download and configure the Kubernetes client

Start by downloading the kubectl client on your machine. In this case, we&8217;re using linux; adjust appropriately for your OS.
$ curl -O https://storage.googleapis.com/kubernetes-release/release/v1.4.3/bin/linux/amd64/kubectl

Make kubectl executable:
$ chmod +x kubectl

Move it to your path:
$ sudo mv kubectl /usr/local/bin/kubectl

Now it&8217;s time to set the default cluster. To do that, you&8217;ll want to use the URL that you got from the environment deployment log. Also, make sure you provide the full location of the ca.pem file, as in:
$ kubectl config set-cluster default-cluster –server=[KUBERNETES_API_URL] –certificate-authority=[FULL-PATH-TO]/ca.pem
In my case, this works out to:
$ kubectl config set-cluster default-cluster –server=http://172.18.237.137:8080 –certificate-authority=/home/ubuntu/ca.pem

Next you need to tell kubectl where to find the credentials, as in:
$ kubectl config set-credentials default-admin –certificate-authority=[FULL-PATH-TO]/ca.pem –client-key=[FULL-PATH-TO]/admin-key.pem –client-certificate=[FULL-PATH-TO]/admin.pem
Again, in my case this works out to:
$ kubectl config set-credentials default-admin –certificate-authority=/home/ubuntu/ca.pem –client-key=/home/ubuntu/admin-key.pem –client-certificate=/home/ubuntu/admin.pem

Now you need to set the context so kubectl knows to use those credentials:
$ kubectl config set-context default-system –cluster=default-cluster –user=default-admin
$ kubectl config use-context default-system

Now you should be able to see the cluster:
$ kubectl cluster-info

Kubernetes master is running at http://172.18.237.137:8080
To further debug and diagnose cluster problems, use ‘kubectl cluster-info dump’.

Terrific!  Now we just need to go ahead and run something on it.
Running an app on Kubernetes
Running an app on Kubernetes is pretty simple and is related to firing up a container. We&8217;ll go into the details of what everything means later, but for now, just follow along.

Start by creating a deployment that runs the nginx web server:
$ kubectl run my-nginx –image=nginx –replicas=2 –port=80

deployment “my-nginx” created

Be default, containers are only visible to other members of the cluster. To expose your service to the public internet, run:
$ kubectl expose deployment my-nginx –target-port=80 –type=NodePort

service “my-nginx” exposed

OK, so now it&8217;s exposed, but where?  We used the NodePort type, which means that the external IP is just the IP of the node that it&8217;s running on, as you can see if you get a list of services:
$kubectl get services

NAME         CLUSTER-IP    EXTERNAL-IP   PORT(S)   AGE
kubernetes   11.1.0.1      <none>        443/TCP   3d
my-nginx     11.1.116.61   <nodes>       80/TCP    18s

So we know that the &;nodes&; referenced here are kube-2 and kube-3 (remember, kube-1 is the API server), and we can get their IP addresses from the Instances page&;

&8230; but that doesn&8217;t tell us what the actual port number is.  To get that, we can describe the actual service itself:
$ kubectl describe services my-nginx

Name:                   my-nginx
Namespace:              default
Labels:                 run=my-nginx
Selector:               run=my-nginx
Type:                   NodePort
IP:                     11.1.116.61
Port:                   <unset> 80/TCP
NodePort:               <unset> 32386/TCP
Endpoints:              10.200.41.2:80,10.200.9.2:80
Session Affinity:       None
No events.

So the service is available on port 32386 of whatever machine you hit.  But if you try to access it, something&8217;s still not right:
$ curl http://172.18.237.138:32386

curl: (7) Failed to connect to 172.18.237.138 port 32386: Connection timed out

The problem here is that by default, this port is closed, blocked by the default security group.  To solve this problem, create a new security group you can apply to the Kubernetes nodes.  Start by choosing Project->Compute->Access & Security->+Create Security Group.
Specify a name for the group and click Create Security Group.
Click Manage Rules for the new group.

By default, there&8217;s no access in; we need to change that.  Click +Add Rule.

In this case, we want a Custom TCP Rule that allows Ingress on port 32386 (or whatever port Kubernetes assigned the NodePort). You  can specify access only from certain IP addresses, but we&8217;ll leave that open in this case. Click Add to finish adding the rule.

Now that you have a functioning security group you need to add it to the instances Kubernetes is using as worker nodes &; in this case, the kube-2 and kube-3 nodes.  Start by clicking the small triangle on the button at the end of the line for each instance and choosing Edit Security Groups.
You should see the new security group in the left-hand panel; click the plus sign (+) to add it to the instance:

Click Save to save the changes.

Add the security group to all worker nodes in the cluster.
Now you can try again:
$ curl http://172.18.237.138:32386

<!DOCTYPE html>
<html>
<head>
<title>Welcome to nginx!</title>
<style>
   body {
       width: 35em;
       margin: 0 auto;
       font-family: Tahoma, Verdana, Arial, sans-serif;
   }
</style>
</head>
<body>
<h1>Welcome to nginx!</h1>
<p>If you see this page, the nginx web server is successfully installed and
working. Further configuration is required.</p>
<p>For online documentation and support please refer to
<a href=”http://nginx.org/”>nginx.org</a>.<br/>
Commercial support is available at
<a href=”http://nginx.com/”>nginx.com</a>.</p>
<p><em>Thank you for using nginx.</em></p>
</body>
</html>
As you can see, you can now access the Nginx container you deployed on the Kubernetes cluster.

Coming up, we&8217;ll look at some of the more useful things you can do with containers and with Kubernetes. Got something you&8217;d like to see?  Let us know in the comments below.
The post Creating and accessing a Kubernetes cluster on OpenStack, part 3: Run the application appeared first on Mirantis | The Pure Play OpenStack Company.
Quelle: Mirantis