Global Mentor Week: Thank you Docker Community!

Danke, рақмет сізге, tak, धन्यवाद, cảm ơn bạn, شكرا, mulțumesc, Gracias, merci, asante, ευχαριστώ, thank you community for an incredible Docker Global Mentor Week! From Tokyo to Sao Paulo, Kisimu to Copenhagen and Ottowa to Manila, it was so awesome to see the energy from the community coming together to celebrate and learn about Docker!

Over 7,500 people registered to attend one of the 110 mentor week events across 5 continents! A huge thank you to all the Docker meetup organizers who worked hard to make these special events happen and offer Docker beginners and intermediate users an opportunity to participate in Docker courses.
None of this would have been possible without the support (and expertise!) of the 500+ advanced Docker users who signed up as mentors to help newcomers .
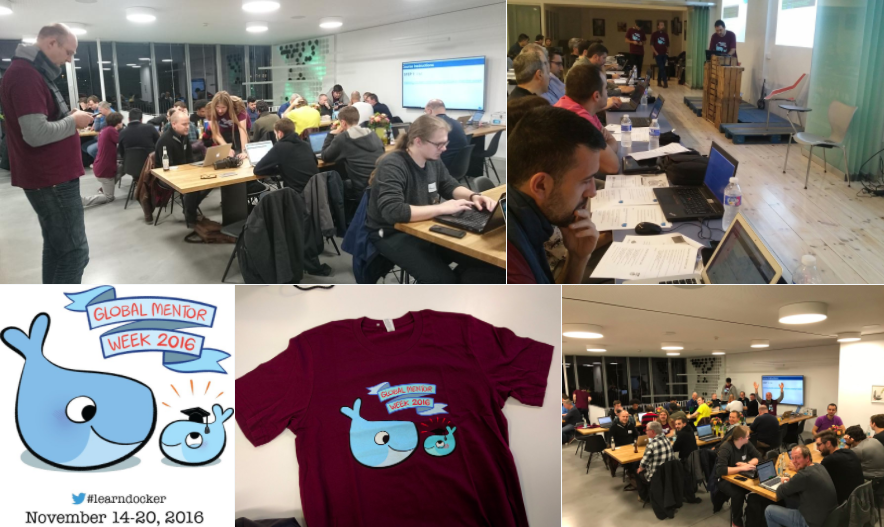
Whether it was mentors helping attendees, newcomers pushing their first image to Docker Hub or attendees mingling and having a good time, everyone came together to make mentor week a success as you can see on social media and the Facebook photo album.
Here are some of our favorite tweets from the meetups:
 

@Docker LearnDocker at Grenoble France 17Nov2016 @HPE_FR pic.twitter.com/8RSxXUWa4k
— Stephane Bureau (@SBUCloud) November 18, 2016

Awesome turnout at tonight&;s @DockerNYC learndocker event! We will be hosting more of these &; Keep tabs on meetup: https://t.co/dT99EOs4C9 pic.twitter.com/9lZocCjMPb
— Luisa M. Morales (@luisamariethm) November 18, 2016

And finally&; &;Tada&; Docker Mentor Weeklearndocker pic.twitter.com/6kzedIoGyB
— Károly Kass (@karolykassjr) November 17, 2016

 
Learn Docker
In case you weren’t able to attend a local event, the five courses are now available to everyone online here: https://training.docker.com/instructor-led-training
Docker for Developers Courses
Developer &8211; Beginner Linux Containers
This tutorial will guide you through the steps involved in setting up your computer, running your first containers, deploying a web application with Docker and running a multi-container voting app with Docker Compose.
Developer &8211; Beginner Windows Containers
This tutorial will walk you through setting up your environment, running basic containers and creating a Docker Compose multi-container application using Windows containers.
Developer &8211; Intermediate (both Linux and Windows)
This tutorial teaches you how to network your containers, how you can manage data inside and between your containers and how to use Docker Cloud to build your image from source and use developer tools and programming languages with Docker.
Docker for Operations courses
This courses are step-by-step guides where you will build your own Docker cluster, and use it to deploy a sample application. We have two solutions for you to create your own cluster.

Using play-with-docker

Play With Docker is a Docker playground that was built by two amazing Docker captains: Marcos Nils and Jonathan Leibiusky during the Docker Distributed Systems Summit in Berlin last October.
Play with Docker (aka PWD) gives you the experience of having a free Alpine Linux Virtual Machine in the cloud where you can build and run Docker containers and even create clusters with Docker features like Swarm Mode.
Under the hood DIND or Docker-in-Docker is used to give the effect of multiple VMs/PCs.
To get started, go to http://play-with-docker.com/ and click on ADD NEW INSTANCE five times. You will get five &8220;docker-in-docker&8221; containers, all on a private network. These are your five nodes for the workshop!
When the instructions in the slides tell you to &8220;SSH on node X&8221;, just go to the tab corresponding to that node.
The nodes are not directly reachable from outside; so when the slides tell you to &8220;connect to the IP address of your node on port XYZ&8221; you will have to use a different method.
We suggest to use &8220;supergrok&8221;, a container offering a NGINX+ngrok combo to expose your services. To use it, just start (on any of your nodes) the jpetazzo/supergrok image. The image will output further instructions:
docker run –name supergrok -d jpetazzo/supergrok
docker logs –follow supergrok
The logs of the container will give you a tunnel address and explain you how to connected to exposed services. That&8217;s all you need to do!
You can also view this excellent video by Docker Brussels Meetup organizer Nils de Moor who walks you through the steps to build a Docker Swarm cluster in a matter of seconds through the new play-with-docker tool.

 
Note that the instances provided by Play-With-Docker have a short lifespan (a few hours only), so if you want to do the workshop over multiple sessions, you will have to start over each time &8230; Or create your own cluster with option below.

Using Docker Machine to create your own cluster

This method requires a bit more work to get started, but you get a permanent cluster, with less limitations.
You will need Docker Machine (if you have Docker Mac, Docker Windows, or the Docker Toolbox, you&8217;re all set already). You will also need:

credentials for a cloud provider (e.g. API keys or tokens),
or a local install of VirtualBox or VMware (or anything supported by Docker Machine).

Full instructions are in the prepare-machine subdirectory.
Once you have decided what option to choose to create your swarm cluster, you ready to get started with one of the operations course below:
Operations &8211; Beginner
The beginner part of the Ops tutorial will teach you how to set up a swarm, how to use it to host your own registry, how to build your app container images and how to deploy and scale a distributed application called Dockercoins.
Operations &8211; Intermediate
From global container scheduling, overlay networks troubleshooting, dealing with stateful services and node management, this tutorial will show you how to operate your swarm cluster at scale and take you on a swarm mode deep dive.

Danke, Gracias, Merci, Asante, ευχαριστώ, thank you Docker community for an amazing&8230;Click To Tweet

The post Global Mentor Week: Thank you Docker Community! appeared first on Docker Blog.
Quelle: https://blog.docker.com/feed/
Automate bare metal server provisioning using Ironic (bifrost) and the ansible deploy driver

The post Automate bare metal server provisioning using Ironic (bifrost) and the ansible deploy driver appeared first on Mirantis | The Pure Play OpenStack Company.
On our team, we mostly conduct various research in OpenStack, so we use bare metal machines extensively. To make our lives somewhat easier, we&;ve developed a set of simple scripts that enables us to backup and restore the current state of the file system on the server. It also enables us to switch between different backups very easily. The set of scripts is called multi-root (https://github.com/vnogin/multi-root).
Unfortunately, we had a problem; in order to use this tool, we had to have our servers configured in a particular way, and we faced different issues with manual provisioning:

It is not possible to set up more than one bare metal server at a time using a Java-based IPMI application
The Java-based IPMI application does not properly handle disconnection from the remote host due to connectivity problems (you have to start installation from the very beginning)
The bare metal server provisioning procedure was really time consuming
For our particular case, in order to use multi-root functionality we needed to create software RAID and make required LVM configurations prior to operating system installation

To solve these problems, we decided to automate bare metal node setup, and since we are part of the OpenStack community, we decided to use bifrost instead of other provisioning tools. Bifrost was a good choice for us as it does not require other OpenStack components.
Lab structure
This is how we manage disk partitions and how we use software RAID on our machines:

As you can see here, we have the example of a bare metal server, which includes two physical disks.  Those disks are combined using RAID1, then partitioned by the operating system.  The LVM partition then gets further partitioned, with each copy of an operating system image assigned to its own partition.
This is our network diagram:

In this case we have one network to which our bare metal nodes are attached. Also attached to that network is the IRONIC server. A DHCP server assigns IP addresses for the various instances as they&8217;re provisioned on the bare metal nodes, or prior to the deployment procedure (so that we can bootstrap the destination server).
Now let&8217;s look at how to make this work.
How to set up bifrost with ironic-ansible-driver
So let&8217;s get started.

First, add the following line to the /root/.bashrc file:
# export LC_ALL=”en_US.UTF-8″

Ensure the operating system is up to date:
# apt-get -y update && apt-get -y upgrade

To avoid issues related to MySQL, we decided to ins tall it prior to bifrost and set the MySQL password to &;secret&;:
# apt-get install git python-setuptools mysql-server -y

Using the following guideline, install and configure bifrost:
# mkdir -p /opt/stack
# cd /opt/stack
# git clone https://git.openstack.org/openstack/bifrost.git
# cd bifrost

We need to configure a few parameters related to localhost prior to the bifrost installation. Below, you can find an example of an /opt/stack/bifrost/playbooks/inventory/group_vars/localhost file:
echo “—
ironic_url: “http://localhost:6385/”
network_interface: “p1p1″
ironic_db_password: aSecretPassword473z
mysql_username: root
mysql_password: secret
ssh_public_key_path: “/root/.ssh/id_rsa.pub”
deploy_image_filename: “user_image.qcow2″
create_image_via_dib: false
transform_boot_image: false
create_ipa_image: false
dnsmasq_dns_servers: 8.8.8.8,8.8.4.4
dnsmasq_router: 172.16.166.14
dhcp_pool_start: 172.16.166.20
dhcp_pool_end: 172.16.166.50
dhcp_lease_time: 12h
dhcp_static_mask: 255.255.255.0″ > /opt/stack/bifrost/playbooks/inventory/group_vars/localhost
As you can see, we&8217;re telling Ansible where to find Ironic and how to access it, as well as the authentication information for the database so state information can be retrieved and saved. We&8217;re specifying the image to use, and the networking information.
Notice that there&8217;s no default gateway for DHCP in the configuration above, so I&8217;m going to fix it manually after the install.yaml playbook execution.
Install ansible and all of bifrost&8217;s dependencies:
# bash ./scripts/env-setup.sh
# source /opt/stack/bifrost/env-vars
# source /opt/stack/ansible/hacking/env-setup
# cd playbooks

After that, let&8217;s install all packages that we need for bifrost (Ironic, MySQL, rabbitmq, and so on) &;
# ansible-playbook -v -i inventory/localhost install.yaml

&8230; and the Ironic staging drivers with already merged patches for enabling Ironic ansible driver functionality:
# cd /opt/stack/
# git clone git://git.openstack.org/openstack/ironic-staging-drivers
# cd ironic-staging-drivers/

Now you&8217;re ready to do the actual installation.
# pip install -e .
# pip install “ansible>=2.1.0″
You should see typical &8220;installation&8221; output.
In the /etc/ironic/ironic.conf configuration file, add the &8220;pxe_ipmitool_ansible&8221; value to the list of enabled drivers. In our case, it&8217;s the only driver we need, so let&8217;s remove the other drivers:
# sed -i ‘/enabled_drivers =*/cenabled_drivers = pxe_ipmitool_ansible’ /etc/ironic/ironic.conf

If you want to enable cleaning and disable disk shredding during the cleaning procedure, add these options to /etc/ironic/ironic.conf:
automated_clean = true
erase_devices_priority = 0

Finally, restart the Ironic conductor service:
# service ironic-conductor restart

To check that everything was installed properly, execute the following command:
# ironic driver-list | grep ansible
| pxe_ipmitool_ansible | test |
You should see the pxe_ipmitool_ansible driver in the output.
Finally, add the default gateway to /etc/dnsmasq.conf (be sure to use the IP address for your own gateway).
# sed -i ‘/dhcp-option=3,*/cdhcp-option=3,172.16.166.1′ /etc/dnsmasq.conf

Now that everything&8217;s set up, let&8217;s look at actually doing the provisioning.
How to use ironic-ansible-driver to provision bare-metal servers with custom configurations
Now let&8217;s look at actually provisioning the servers. Normally, we&8217;d use a custom ansible deployment role that satisfies Ansible&8217;s requirements regarding idempotency to prevent issues that can arise if a role is executed more than once, but because this is essentially a spike solution for us to use in the lab, we&8217;ve relaxed that requirement.  (We&8217;ve also hard-coded a number of values that you certainly wouldn&8217;t in production.)  Still, by walking through the process you can see how it works.

Download the custom ansible deployment role:
curl -Lk https://github.com/vnogin/Ansible-role-for-baremetal-node-provision/archive/master.tar.gz | tar xz -C /opt/stack/ironic-staging-drivers/ironic_staging_drivers/ansible/playbooks/ –strip-components 1

Next, create an inventory file for the bare metal server(s) that need to be provisioned:
# echo “—
 server1:
   ipa_kernel_url: “http://172.16.166.14:8080/ansible_ubuntu.vmlinuz”
   ipa_ramdisk_url: “http://172.16.166.14:8080/ansible_ubuntu.initramfs”
   uuid: 00000000-0000-0000-0000-000000000001
   driver_info:
     power:
       ipmi_username: IPMI_USERNAME
       ipmi_address: IPMI_IP_ADDRESS
       ipmi_password: IPMI_PASSWORD
       ansible_deploy_playbook: deploy_custom.yaml
   nics:
     –
       mac: 00:25:90:a6:13:ea
   driver: pxe_ipmitool_ansible
   ipv4_address: 172.16.166.22
   properties:
     cpu_arch: x86_64
     ram: 16000
     disk_size: 60
     cpus: 8
   name: server1
   instance_info:
     image_source: “http://172.16.166.14:8080/user_image.qcow2″” > /opt/stack/bifrost/playbooks/inventory/baremetal.yml

# export BIFROST_INVENTORY_SOURCE=/opt/stack/bifrost/playbooks/inventory/baremetal.yml
As you can see the above we have added all required information for bare-metal node provisioning using IPMI. If needed you can add information about various number of bare-metal servers here and all of them will be enrolled and deployed later.
Finally, you&8217;ll need to build a ramdisk for the Ironic ansible deploy driver and create a deploy image using DIB (disk image builder). Start by creating an RSA key that will be used for connectivity from the Ironic ansible driver to the provisioning bare metal host:
# su – ironic
# ssh-keygen
# exit

Next set environment variables for DIB:
# export ELEMENTS_PATH=/opt/stack/ironic-staging-drivers/imagebuild
# export DIB_DEV_USER_USERNAME=ansible
# export DIB_DEV_USER_AUTHORIZED_KEYS=/home/ironic/.ssh/id_rsa.pub
# export DIB_DEV_USER_PASSWORD=secret
# export DIB_DEV_USER_PWDLESS_SUDO=yes

Install DIB:
# cd /opt/stack/diskimage-builder/
# pip install .

Create the bootstrap and deployment images using DIB, and move them to the web folder:
# disk-image-create -a amd64 -t qcow2 ubuntu baremetal grub2 ironic-ansible -o ansible_ubuntu
# mv ansible_ubuntu.vmlinuz ansible_ubuntu.initramfs /httpboot/
# disk-image-create -a amd64 -t qcow2 ubuntu baremetal grub2 devuser cloud-init-nocloud -o user_image
# mv user_image.qcow2 /httpboot/

Fix file permissions:
# cd /httpboot/
# chown ironic:ironic *

Now we can enroll anddeploy our bare metal node using ansible:
# cd /opt/stack/bifrost/playbooks/
# ansible-playbook -vvvv -i inventory/bifrost_inventory.py enroll-dynamic.yaml
Wait for the provisioning state to read &8220;available&8221;, as a bare metal server needs to cycle through a few states and could be cleared, if needed. During the enrollment procedure, the node can be cleared by the shred command. This process does take a significant amount of time time, so you can disable or fine tune it in the Ironic configuration (as you saw above where we enabled it).
Now we can start the actual deployment procedure:
# ansible-playbook -vvvv -i inventory/bifrost_inventory.py deploy-dynamic.yaml
If deployment completes properly, you will see the provisioning state for your server as &8220;active&8221; in the Ironic node-list.
+————————————————————–+———+——————–+—————–+————————-+——————+
| UUID                                                    | Name  | Instance UUID | Power State | Provisioning State | Maintenance |
+————————————————————–+———+——————–+—————–+————————-+——————+
| 00000000-0000-0000-0000-000000000001   | server1| None          | power on      | active                     | False            |
+————————————————————–+———+——————–+—————–+————————-+——————+

Now you can log in to the deployed server via ssh using the login and password that we defined above during image creation (ansible/secret) and then, because the infrastructure to use it has now been created, clone the multi-root tool from Github.
Conclusion
As you can see, bare metal server provisioning isn&8217;t such a complicated procedure. Using the Ironic standalone server (bifrost) with the Ironic ansible driver, you can easily develop a custom ansible role for your specific deployment case and simultaneously deploy any number of bare metal servers in automation mode.
I want to say thank you to Pavlo Shchelokovskyy and Ihor Pukha for your help and support throughout the entire process. I am very grateful to you guys.
The post Automate bare metal server provisioning using Ironic (bifrost) and the ansible deploy driver appeared first on Mirantis | The Pure Play OpenStack Company.
Quelle: Mirantis

Creating and accessing a Kubernetes cluster on OpenStack, part 3: Run the application

The post Creating and accessing a Kubernetes cluster on OpenStack, part 3: Run the application appeared first on Mirantis | The Pure Play OpenStack Company.
Finally, you&;re ready to actually interact with the Kubernetes API that you installed. The general process goes like this:

Define the security credentials for accessing your applications.
Deploy a containerized app to the cluster.
Expose the app to the outside world so you can access it.

Let&8217;s see how that works.
Define security parameters for your Kubernetes app
The first thing that you need to understand is that while we have a cluster of machines that are tied together with the Kubernetes API, it can support multiple environments, or contexts, each with its own security credentials.
For example, if you were to create an application with a context that relies on a specific certificate authority, I could then create a second one that relies on another certificate authority. In this way, we both control our own destiny, but neither of us gets to see the other&8217;s application.
The process goes like this:

First, we need to create a new certificate authority which will be used to sign the rest of our certificates. Create it with these commands:
$ sudo openssl genrsa -out ca-key.pem 2048
$ sudo openssl req -x509 -new -nodes -key ca-key.pem -days 10000 -out ca.pem -subj “/CN=kube-ca”

At this point you should have two files: ca-key.pem and ca.pem. You&8217;ll use them to create the cluster administrator keypair. To do that, you&8217;ll create a private key (admin-key.pem), then create a certificate signing request (admin.csr), then sign it to create the public key (admin.pem).
$ sudo openssl genrsa -out admin-key.pem 2048
$ sudo openssl req -new -key admin-key.pem -out admin.csr -subj “/CN=kube-admin”sudo openssl x509 -req -in admin.csr -CA ca.pem -CAkey ca-key.pem -CAcreateserial -out admin.pem -days 365

Now that you have these files, you can use them to configure the Kubernetes client.
Download and configure the Kubernetes client

Start by downloading the kubectl client on your machine. In this case, we&8217;re using linux; adjust appropriately for your OS.
$ curl -O https://storage.googleapis.com/kubernetes-release/release/v1.4.3/bin/linux/amd64/kubectl

Make kubectl executable:
$ chmod +x kubectl

Move it to your path:
$ sudo mv kubectl /usr/local/bin/kubectl

Now it&8217;s time to set the default cluster. To do that, you&8217;ll want to use the URL that you got from the environment deployment log. Also, make sure you provide the full location of the ca.pem file, as in:
$ kubectl config set-cluster default-cluster –server=[KUBERNETES_API_URL] –certificate-authority=[FULL-PATH-TO]/ca.pem
In my case, this works out to:
$ kubectl config set-cluster default-cluster –server=http://172.18.237.137:8080 –certificate-authority=/home/ubuntu/ca.pem

Next you need to tell kubectl where to find the credentials, as in:
$ kubectl config set-credentials default-admin –certificate-authority=[FULL-PATH-TO]/ca.pem –client-key=[FULL-PATH-TO]/admin-key.pem –client-certificate=[FULL-PATH-TO]/admin.pem
Again, in my case this works out to:
$ kubectl config set-credentials default-admin –certificate-authority=/home/ubuntu/ca.pem –client-key=/home/ubuntu/admin-key.pem –client-certificate=/home/ubuntu/admin.pem

Now you need to set the context so kubectl knows to use those credentials:
$ kubectl config set-context default-system –cluster=default-cluster –user=default-admin
$ kubectl config use-context default-system

Now you should be able to see the cluster:
$ kubectl cluster-info

Kubernetes master is running at http://172.18.237.137:8080
To further debug and diagnose cluster problems, use ‘kubectl cluster-info dump’.

Terrific!  Now we just need to go ahead and run something on it.
Running an app on Kubernetes
Running an app on Kubernetes is pretty simple and is related to firing up a container. We&8217;ll go into the details of what everything means later, but for now, just follow along.

Start by creating a deployment that runs the nginx web server:
$ kubectl run my-nginx –image=nginx –replicas=2 –port=80

deployment “my-nginx” created

Be default, containers are only visible to other members of the cluster. To expose your service to the public internet, run:
$ kubectl expose deployment my-nginx –target-port=80 –type=NodePort

service “my-nginx” exposed

OK, so now it&8217;s exposed, but where?  We used the NodePort type, which means that the external IP is just the IP of the node that it&8217;s running on, as you can see if you get a list of services:
$kubectl get services

NAME         CLUSTER-IP    EXTERNAL-IP   PORT(S)   AGE
kubernetes   11.1.0.1      <none>        443/TCP   3d
my-nginx     11.1.116.61   <nodes>       80/TCP    18s

So we know that the &;nodes&; referenced here are kube-2 and kube-3 (remember, kube-1 is the API server), and we can get their IP addresses from the Instances page&;

&8230; but that doesn&8217;t tell us what the actual port number is.  To get that, we can describe the actual service itself:
$ kubectl describe services my-nginx

Name:                   my-nginx
Namespace:              default
Labels:                 run=my-nginx
Selector:               run=my-nginx
Type:                   NodePort
IP:                     11.1.116.61
Port:                   <unset> 80/TCP
NodePort:               <unset> 32386/TCP
Endpoints:              10.200.41.2:80,10.200.9.2:80
Session Affinity:       None
No events.

So the service is available on port 32386 of whatever machine you hit.  But if you try to access it, something&8217;s still not right:
$ curl http://172.18.237.138:32386

curl: (7) Failed to connect to 172.18.237.138 port 32386: Connection timed out

The problem here is that by default, this port is closed, blocked by the default security group.  To solve this problem, create a new security group you can apply to the Kubernetes nodes.  Start by choosing Project->Compute->Access & Security->+Create Security Group.
Specify a name for the group and click Create Security Group.
Click Manage Rules for the new group.

By default, there&8217;s no access in; we need to change that.  Click +Add Rule.

In this case, we want a Custom TCP Rule that allows Ingress on port 32386 (or whatever port Kubernetes assigned the NodePort). You  can specify access only from certain IP addresses, but we&8217;ll leave that open in this case. Click Add to finish adding the rule.

Now that you have a functioning security group you need to add it to the instances Kubernetes is using as worker nodes &; in this case, the kube-2 and kube-3 nodes.  Start by clicking the small triangle on the button at the end of the line for each instance and choosing Edit Security Groups.
You should see the new security group in the left-hand panel; click the plus sign (+) to add it to the instance:

Click Save to save the changes.

Add the security group to all worker nodes in the cluster.
Now you can try again:
$ curl http://172.18.237.138:32386

<!DOCTYPE html>
<html>
<head>
<title>Welcome to nginx!</title>
<style>
   body {
       width: 35em;
       margin: 0 auto;
       font-family: Tahoma, Verdana, Arial, sans-serif;
   }
</style>
</head>
<body>
<h1>Welcome to nginx!</h1>
<p>If you see this page, the nginx web server is successfully installed and
working. Further configuration is required.</p>
<p>For online documentation and support please refer to
<a href=”http://nginx.org/”>nginx.org</a>.<br/>
Commercial support is available at
<a href=”http://nginx.com/”>nginx.com</a>.</p>
<p><em>Thank you for using nginx.</em></p>
</body>
</html>
As you can see, you can now access the Nginx container you deployed on the Kubernetes cluster.

Coming up, we&8217;ll look at some of the more useful things you can do with containers and with Kubernetes. Got something you&8217;d like to see?  Let us know in the comments below.
The post Creating and accessing a Kubernetes cluster on OpenStack, part 3: Run the application appeared first on Mirantis | The Pure Play OpenStack Company.
Quelle: Mirantis

Creating and accessing a Kubernetes cluster on OpenStack, part 2: Access the cluster

The post Creating and accessing a Kubernetes cluster on OpenStack, part 2: Access the cluster appeared first on Mirantis | The Pure Play OpenStack Company.
To access the Kubernetes cluster we created in part 1, we&;re going to create a Ubuntu VM (if you have a Ubuntu machine handy you can skip this step), then configure it to access the Kubernetes API we just deployed.
Create the client VM

Create a new VM by choosing Project->Compute->Intances->Launch Instance:

Fortunately you don&8217;t have to worry about obtaining an image, because you&8217;ll have the Ubuntu Kubernetes image that was downloaded as part of the Murano app. Click the plus sign (+) to choose it.  (You can choose another distro if you like, but these instructions assume you&8217;re using Ubuntu.)

You don&8217;t need a big server for this, but it needs to be big enough for the Ubuntu image we selected, so choose the m1.small flavor:

Chances are it&8217;s already on the network with the cluster, but that doesn&8217;t matter; we&8217;ll be using floating IPs anyway. Just make sure it&8217;s on a network, period.

Next make sure you have a key pair, because we need to log into this machine:

After it launches&;

Add a floating IP if necessary to access it by clicking the down arrow on the button at the end of the line and choosing Associate Floating IP.  If you don&8217;t have any floating IP addresses allocated, click the plus sign (+) to allocate a new one:

Choose the appropriate network and click Allocate IP:

Now add it to your VM:

You&8217;ll see the new Floating IP listed with the Instance:

Before you can log in, however, you&8217;ll need to make sure that the security group allows for SSH access. Choose Project->Compute->Access & Security and click Manage Rules for the default security group:

Click +Add Rule:

Under Rule, choose SSH at the bottom and click Add.

You&8217;ll see the new rule on the Manage Rules page:

Now use your SSH client to go ahead and log in using the username ubuntu and the private key you specified when you created the VM.

Now you&8217;re ready to actually deploy containers to the cluster.

The post Creating and accessing a Kubernetes cluster on OpenStack, part 2: Access the cluster appeared first on Mirantis | The Pure Play OpenStack Company.
Quelle: Mirantis

Your Docker Agenda for November 2016

November is packed with plenty of great events including over 75 Global Mentor Week local events to learn all about Docker! This global event series aims to provide Docker training to both newcomers and intermediate Docker users. More advanced users will have the opportunity to get involved as mentors to further encourage connection and collaboration within the community. Check out the list of confirmed events below to see if there is one happening near you. Make sure to check back as we’ll be updating this list as more events are announced.
Want to help us organize a Mentor Week training in your city? Email us at meetups@docker.com for more information!


From webinars to workshops, meetups to conference talks, check out our list of events that are coming up in November!
Official Docker Training Courses
View the full schedule of instructor led training courses here!
Introduction to Docker:
This is a two-day, on-site or classroom-based training course which introduces you to the Docker platform and takes you through installing, integrating, and running it in your working environment.
Nov 15-16: Introduction to Docker with Amazic &;  Nieuw-Vennep, The Netherlands
Nov 24-25: Introduction to Docker with Docker Captain Benjamin Wootton &8211; London, United Kingdom

Docker Administration and Operations:
The Docker Administration and Operations course consists of both the Introduction to Docker course, followed by the Advanced Docker Topics course, held over four consecutive days.
Nov 15-18: Docker Administration and Operations with Amazic &8211; Nieuw-Vennep, The Netherlands
Nov 15-18: Docker Administration and Operations with TREEPTIK &8211; Aix en Provence, France
Nov 15-18: Docker Administration and Operations with Vizuri &8211; Washington, D.C.
Nov 21-24: Docker Administration and Operations with Hopla! Software &8211; Lisbon, Portugal
Nov 22-25 11-15: Docker Administration and Operations with TREEPTIK &8211; Paris, France
Nov 29 &8211; Dec 2: Docker Administration and Operations with TEEPTIK &8211; Montreal, Canada
 
Advanced Docker Operations:
This two day course is designed to help new and experienced systems administrators learn to use Docker to control the Docker daemon, security, Docker Machine, Swarm, and Compose.
Nov 9-10: Advanced Docker Operations with Alter Way &8211; St Cloud, France
Nov 17-18:  Advanced Docker Operations with Amazic &8211; Nieuw-Vennep, The Netherlands

Online
 
Nov 9th: Introduction to InfraKit
While working on Docker for AWS and Azure, we realized the need for a standard way to create and manage infrastructure state that was portable across any type of infrastructure, from different cloud providers to on-prem. One challenge is that each vendor has differentiated IP invested in how they handle certain aspects of their cloud infrastructure. It is not enough to just provision five servers; what IT ops teams need is a simple and consistent way to declare the number of servers, what size they should be, and what sort of base software configuration is required.
Nov 11th: Docker Talk at CheConf16
Che provides a new way to package up a workspace so that it is reproducible and portable. This packaging is possible due to Docker with their descriptive runtimes. This introductory session will introduce you to what Docker is about and how Che uses Docker to represent workspaces, it’s server, it’s launcher, a variety of build utilities. You can even use Docker and Compose to build complex multi machine workspaces.
Nov 16th:  Docker Datacenter Demo
In this live presentation you will learn about our Docker Datacenter commercial solution and how it enables enterprise application teams to embrace cloud strategies, application modernization and DevOps. We will then show a live demo of the solution and host a QA session at the end.
 
Europe
 
Nov 4th: DOCKER MEETUP AT EYEO GMBH &8211; Koln, Germany
Docker Introduction for Developers.
Nov 7th: DEVOXX BELGIUM &8211; Antwerp, Belgium
Docker is at Devoxx! Join Docker&;s Richard Mortier, Justin Cormack & Patrick Chanezon and Docker Captain Phil Estes for the latest Docker updates and deep dives.
Nov 7th: VELOCITY AMSTERDAM &8211; Amsterdam, The Netherlands
Docker&8217;s Amir Chaundhry will discuss unikernels in his Programming IoT talk and Jérôme Petazzoni will deliver a two-day training on Deployment and orchestration at scale with Docker. Docker Captain Adrian Mouat will deliver a tutorial on Docker and Microservices Security.
Nov 9th: DOCKER MEETUP AT DIE ZENTRALE &8211; Frankfurt, Germany
Secrets of Docker Swarm mode.
Nov 14th: GOTO BERLIN &8211; Berlin, Germany
Join Docker Captain Adrian Mouat for Container and Microservices Security.
Nov 15th: CONTAINERCONF 2016 &8211; Mannheim, Germany
Docker Captain Philipp Garbe will cover deploying Docker on AWS and Docker Captain Dieter Reuter will speak about IoT and Docker.
Nov 15th: DEVOPSPRO MOSCOW &8211; Moscow, Russia
Docker Captain Viktor Farcic will be speaking.
Nov 29th: DOCKER MEETUP AT LEINELAB E.V. &8211; Hannover, Germany
Join us for the next Docker Hannover meetup!
Nov 29th &8211; Dec 1st: HPE Discover 2016 London &8211; London, GB
We had a great time at Discover 2016 North America and are returning for a second time to Discover 2016 in London! Check us out for in-depth demos at booth .

Asia
Nov 13th: DOCKER ORCHESTRATION SESSION AT BARCAMP SAIGON &8211; Thanh Pho Ho Chi Minh, Vietnam
Come join us for a two hour Docker Orchestration workshop at Barcamp Saigon by Docker Captain and Organizer Vincent De Smet.
Nov 16th: LET’S MEETUP AND VIEW DOCKER IN ACTION! &8211; Colombo, Sri Lanka
A presentation on the Docker basics with a demo by Sanjeewa Alwis from Pearson.

North America 
Nov 3rd: CONTAINER DAYS NYC 2016 &8211; New York City, NY
Container Days NYC features Docker Captain Shawn Bower leading an Orchestrating Containers workshop and Docker Captain Francisco Souza delivering Growing Up With Docker: How Docker and Tsuru Have Evolved.
Nov 7th: IMPACT &8211; La Jolla, CA
Mike Coleman from Docker and Docker Captain Kendrick Coleman will be speaking
Nov 9th: DOCKER MEETUP AT LIBERTY MUTUAL &8211; Portland, ME
Docker Container Application Security Deep Dive by Tsvi Korren as well as talks by Ken Cochrane from Docker and Robert Desjarlais.
Nov 10th: DOCKER MEETUP AT RED VENTURES &8211; Charlotte, NC
For this month, we&8217;re hosting AWS Solutions Architect Peter Dalbhanjan to talk about Microservices and ECS!
Nov 28th &8211; Dec 2nd: AWS re:Invent 2016 &8211; Las Vegas, NV
We’re looking forward to another great year at re:Invent in Las Vegas! This time, Docker is outfitted with a larger, custom booth and your chance of scoring even cooler swag. Come see us at inside re:Invent Central.
Nov 29th: NODE.JS INTERACTIVE &8211; AUSTIN, TX
Sophia Parafina from Docker will share how to build and ship apps with Node.js and Docker.
Nov 29th: AMAZON WEB SERVICES &8211; San Mateo, CA
An overview of some of the key concepts inside the service running Docker as the base run time meaning that everything run in EC2 is a Docker image.
 
South America
GOPHERCON BR &8211; Florianópolis-SC, Brazil
Nov 5th: Docker Captain Marcos Nils will share how to deploy Golang apps with Docker

Oceania
Nov 7th: DOCKER MEETUP AT CATALYST IT &8211; Wellington, New Zealand
We&8217;d like to kick things off again with meetings on the first Monday of every month. Our next scheduled meeting is the 7th of November.
Nov 17th: DOCKER MEETUP AT CCI &8211; Noumea, New Caledonia
Presentation of the Docker Meetup Noumea introduction to Docker by Mathieu Filotto, software architect and trainer and Meetup Organizer of Docker Noumea. Session: Microsoft Windows Server 2016 and Azure &8211; Micro services and Containers by Siddick Elaheebocus, Mauritian origin, consultant and trainer specializing in Microsoft technologies and computer security SPILOG in New Caledonia and French Polynesia.
Nov 24th: DOCKER MEETUP AT CCI &8211; Noumea, New Caledonia
Join our November meetup!
 
Africa
Nov 2nd: DEVOXX MOROCCO &8211; Casablanca, Morocco
Join Docker Captain Nicolas De loof at Devoxx Morocco to learn about Containers&8217; Jungle. Docker, Rocket, RunC, LXD &; WTF? and how to Pimp your CI/CD with Docker-pipeline.
Nov 7th: DEVOPS DAYS CAPE TOWN 2016 &8211; Cape Town, South Africa
Join Docker Captain Tim Haak in Cape Town, South Africa to learnabout Docker 1.12 and The Simplicity of Docker Swarm.
 

Check out the list of upcoming docker events, meetups and conferences!  Click To Tweet

The post Your Docker Agenda for November 2016 appeared first on Docker Blog.
Quelle: https://blog.docker.com/feed/

What you missed at OpenStack Barcelona

The post What you missed at OpenStack Barcelona appeared first on Mirantis | The Pure Play OpenStack Company.
The OpenStack Summit in Barcelona was, in some ways, like those that had preceded it &; and in other ways, it was very different.  As in previous years, the community showed off large customer use cases, but there was something different this year: whereas before it had been mostly early adopters &8212; and the same early adopters, for a time &8212; this year there were talks from new faces with very large use cases, such as Sky TV and Banco Santander.
And why not? Statistically, OpenSTack seems to have turned a corner, with the semi-annual user survey showing that workloads are no longer just development and testing but actual production, users are no longer limited to huge corporations but also to work at small to medium sized businesses, and containers have gone from an existential threat to a solution with which to work, not fight, and concerns about interoperability seem to have been squashed, finally.
Let&;s look at some of the highlights of the week.

It&8217;s traditional to bring large users up on stage during the keynotes, but this year, with users such as Spain&8217;s largest bank, Banco Santander, Britain&8217;s broadcaster, Sky UK, the world&8217;s largest particle physics laboratory, CERN, and the world&8217;s largest retailer, Walmart, it did seem more like showing what OpenStack can do, than in previous years, when it was more about proving that anybody was actually using it in the first place.
For example, Cambridge’s Dr. Rosie Bolton talked about the SKA radio observatory  that will look at 65,000 frequency channels, consuming and destroying 1.3 zettabytes of data every six hours. The project will run for 50 years cost over a billion dollars.

This.is.Big.Data @OpenStack   pic.twitter.com/XgT3eEjDVh
— Sean Kerner (@TechJournalist) October 25, 2016

OpenStack Foundation CEO Mark Collier also introduced enhancements to the OpenStack Project Navigator, which provides information on the individual projects and their maturity, corporate diversity, adoption, and so on. The Navigator now includes a Sample Configs section, which provides the projects that are normally used for various use cases, such as web applications, eCommerce, and high throughput computing.
Research from 451 Research
The Foundation also talked about findings from a new 451 Research report that looked at OpenStack adoption and challenges.  
Key findings from the 451 Research include:

Mid-market adoption shows that OpenStack use is not limited to large enterprises. Two-thirds of respondents (65 percent) are in organizations of between 1,000 and 10,000 employees.1
OpenStack-powered clouds have moved beyond small-scale deployments. Approximately 72 percent of OpenStack enterprise deployments are between 1,000 to 10,000 cores in size. Additionally, five percent of OpenStack clouds among enterprises top the 100,000 core mark.
OpenStack supports workloads that matter to enterprises, not just test and dev. These include infrastructure services (66 percent), business applications and big data (60 percent and 59 percent, respectively), and web services and ecommerce (57 percent).
OpenStack users can be found in a diverse cross section of industries. While 20 percent cited the technology industry, the majority come from manufacturing (15 percent), retail/hospitality (11 percent), professional services (10 percent), healthcare (7 percent), insurance (6 percent), transportation (5 percent), communications/media (5 percent), wholesale trade (5 percent), energy & utilities (4 percent), education (3 percent), financial services (3 percent) and government (3 percent).
Increasing operational efficiency and accelerating innovation/deployment speed are top business drivers for enterprise adoption of OpenStack, at 76 and 75 percent, respectively. Supporting DevOps is a close second, at 69 percent. Reducing cost and standardizing on OpenStack APIs were close behind, at 50 and 45 percent, respectively.

The report talked about the challenge OpenStack faces from containers in the infrastructure market, but contrary to the notion that more companies were leaning on containers than OpenStack, the report pointed out that OpenStack users are adopting containers at a faster rate than the rest of the enterprise market, with 55 percent of OpenStack users also using containers, compared to just 17 percent across all respondents.
According to Light Reading, &;451 Research believes OpenStack will succeed in private cloud and providing orchestration between public cloud and on-premises and hosted OpenStack.&;
The Fall 2016 OpenStack User Survey
The OpenStack Summit is also the where we hear the results of the semi-annual user-survey. In this case, the key findings among OpenStack deployments include:

Seventy-two percent of OpenStack users cite cost savings as their No. 1 business driver.
The Net Promoter Score (NPS) for OpenStack deployments—an indicator of user satisfaction—continues to tick up, eight points higher than a year ago.
Containers continues to lead the list of emerging technologies, as it has for three consecutive survey cycles. In the same question, interest in NFV and bare metal is significantly higher than a year ago.
Kubernetes shows growth as a container orchestration tool.
Seventy-one percent of deployments catalogued are in “production” versus in testing or proof of concept. This is a 20 percent increase year over year.
OpenStack is adopted by companies of every size. Nearly one-quarter of users are organizations smaller than 100 people.

New this year is the ability to explore the full data, rather than just relying on highlights.
Community announcements
Also announced during the keynotes were new Foundation Gold members, the winner of the SuperUser award, and progress on the Foundation&8217;s Certified OpenStack Administrator exam.
The OpenStack Foundation charter allows for 24 Gold member companies, who elect 8 Board Directors to represent them all.  (The other members include one each chosen by the 8 Platinum member companies, and 8 individual directors elected by the community at large.) Gold member companies must be approved by existing board members, and this time around City Network, Deutsche Telekom, 99Cloud and China Mobile were added.
China Mobile was also given the Superuser award, which honors a company&8217;s commitment to and use of OpenStack.
Meanwhile, in Austin, the Foundation announced the Certified OpenStack Administrator exam, and in the past six months, 500 individuals have taken advantage of the opportunity.
And then there were the demos&;
While demos used to be simply to show how the software works, that now seems to be a given, and instead demos were done to tackle serious issues.  For example, Network Functions Virtualization is a huge subject for OpenStack users &8212; in fact 86% of telcos say OpenStack will be essential to their adoption of the technology &8212; but what is it, exactly?  Mark Collier and representatives of the OPNFV and Vitrage projects were able to demonstrate how OpenStack applies in this case, showing how a High Availability Virtual Network Function (VNF) enables the system to keep a mobile phone call from disconnecting even if a cable or two is cut.  (In this case, literally, as Mark Collier levied a comically huge pair of scissors against the hardware.)
But perhaps the demo that got the most attention wasn&8217;t so much of a demo as a challenge.  One of the criticisms constantly levied against OpenStack is that there&8217;s no &8220;vanilla&8221; version &8212; that despite the claims of freedom from lock-in, each distribution of OpenStack is so different from the others that it&8217;s impossible to move an application from one distro to another.
To fight that charge, the OpenStack community has been developing RefStack, a series of tests that a distro must pass in order to be considered &8220;OpenStack&8221;. But beyond that, IBM issued the &8220;Interoperability Challenge,&8221; which required teams to take a standard deployment tool &8212; in this case, based on Ansible &8212; and use it, unmodified, to create a WordPress-hosting LAMP stack.
In the end, 18 companies joined the challenge, and 16 of them appeared on stage to simultaneously take part.
So the question remained: would it work?  See for yourself:

Coming up next
So the next OpenStack Summit will be in Boston, May 8-12, 2017. For the first time, however, it won&8217;t include the OpenStack Design Summit, which will be replaced by a separate Project Teams Gathering, so it&8217;s likely to once again have a different feel and flavor as the community &8212; and the OpenStack industry &8212; grows.
The post What you missed at OpenStack Barcelona appeared first on Mirantis | The Pure Play OpenStack Company.
Quelle: Mirantis

Announcing Docker Global Mentor Week 2016

Building on the the success of the Docker Birthday  Celebration and Training events earlier this year, we’re excited to announce the Docker Global Mentor Week. This global event series aims to provide Docker training to both newcomers and intermediate Docker users. More advanced users will have the opportunity to get involved as mentors to further encourage connection and collaboration within the community.

The Docker Global Mentor Week is your opportunity to either or help others learndocker. Participants will work through self paced labs that will be available through an online Learning Management System (LMS). We’ll have different labs for beginners and intermediate users, Developers and Ops and Linux or Windows users.
Are you an advanced Docker user?
We are recruiting a network of mentors to help guide learners work through the labs. Mentors will be invited to attend local events to help answer questions attendees may have while completing the self-paced beginner and intermediate labs. To help mentors prepare for their events, we&;ll be sharing the content of the labs and hosting a Q&A session with the Docker team before the start of the global mentor week.
 
Sign up as a Mentor!
 
With over 250 Docker Meetup groups worldwide, there is always an opportunity for collaboration and knowledge sharing. With the launch of Global Mentor Week, Docker is also introducing a Sister City program to help create and strengthen partnerships between local Docker communities which share similar challenges.
Docker NYC Organiser Jesse White talks about their collaboration with Docker London:
“Having been a part of the Docker community ecosystem from the beginning, it&8217;s thrilling for us at Docker NYC to see the community spread across the globe. As direct acknowledgment and support of the importance of always reaching out and working together, we&8217;re partnering with Docker London to capture the essence of what&8217;s great about Docker Global Mentor week. We&8217;ll be creating a transatlantic, volunteer-based partnership to help get the word out, collaborate on and develop training materials, and to boost the recruitment of mentors. If we&8217;re lucky, we might get some international dial-in and mentorship at each event too!”
If you’re part of a community group for a specific programming language, open source software projects, CS students at local universities, coding institutions or organizations promoting inclusion in the larger tech community and interested in learning about Docker, we&8217;d love to partner with you. Please email us at meetups@docker.com for more information about next steps.
We&8217;re thrilled to announce that there are already 37 events scheduled around the world! Check out the list of confirmed events below to see if there is one happening near you. Make sure to check back as we’ll be updating this list as more events are announced. Want to help us organize a Mentor Week training in your city? Email us at meetups@docker.com for more information!
 
Saturday, November 12th

New Delhi, India

Sunday, November 13th

Mumbai, India

Monday, November 14th

Auckland, New Zealand
London, United Kingdom
Mexico City, Mexico
Orange County, CA

Tuesday, November 15th

Atlanta, GA
Austin, TX
Brussels, Belgium
Denver, CO
Jakarta, Indonesia
Las Vegas, NV
Medan, Indonesia
Nice, France
Singapore, Singapore

Wednesday, November 16th

Århus, Denmark
Boston, MA
Dhahran, Saudia Arabia
Hamburg, Germany
Novosibirsk, Russia
San Francisco, CA
Santa Barbara, CA
Santa Clara, CA
Washington, D.C.
Rio de Janeiro, Brazil

Thursday, November 17th

Berlin, Germany
Budapest, Hungary
Glasgow, United Kingdom
Lima, Peru
Minneapolis, MN
Oslo, Norway
Richmond, VA

Friday, November 18th

Kanpur, India
Tokyo, Japan

Saturday, November 19th

Ha Noi, Vietnam
Mangaluru, India
Taipei, Taiwan

Excited about Docker Global Mentor Week? Let your community know!

Excited to learndocker during @docker Global Mentor Week! Get involved by signing up for&;Click To Tweet

The post Announcing Docker Global Mentor Week 2016 appeared first on Docker Blog.
Quelle: https://blog.docker.com/feed/

Auto-remediation: making an Openstack cloud self-healing

The post Auto-remediation: making an Openstack cloud self-healing appeared first on Mirantis | The Pure Play OpenStack Company.
The bigger the Openstack cloud you have, the bigger the operation challenges you will face. Things break &; daemons die, logs fill up the disk, nodes have hardware issues, rabbitmq clusters fall apart, databases get a split brain due to network outages&; All of these problems require engineering time to create outage tickets, troubleshoot and fix the problem &; not to mention writing the RCA and a runbook on how to fix the same problem in the future.
Some of the outages will never happen again if you’ll make the proper long-term fix to the environment, but others will rear their heads again and again. Finding an automated way to handle those issues, either by preventing or fixing them, is crucial if you want to keep your environment stable and reliable.
That&;s where auto-remediation kicks in.
What is Auto-Remediation?
Auto-Remediation, or Self-Healing, is when automation responds to alerts or events by executing actions that can prevent or fix the problem.
The simplest example of auto-remediation is cleaning up the log files of a service that has filled up the available disk space. (It happens to everybody. Admit it.) Imagine an automated action that is triggered by a monitoring system to clean the logs and prevent the service from crashing. In addition, it creates a ticket and sends a notification so the engineer can fix log rotation during business hours, and there is no need to do it in the middle of the night. Furthermore, the event-driven automation can be used for assisted troubleshooting, so when you get an alert it includes related logs, monitoring metrics/graphs, and so on.

This is what an incident resolution workflow should look like:

Auto-remediation tooling
Facebook, LinkedIn, Netflix, and other hyper-scale operators use event-driven automation and workflows, as described above. While looking for an open source solution, we found StackStorm, which was used by Netflix for the same purpose. Sometimes called IFTTT (If This, Then That) for ops, the StackStorm platform is built on the same principles as a famous Facebook FBAR (FaceBook AutoRemediation), with “infrastructure as code”, a scalable microservice architecture, and it&8217;s supported by a solid and responsive team. (They are now part of Brocade, but the project is accelerating.) StackStorm uses OpenStack Mistral as a workflow engine, and offers a rich set of sensors and actions that are easy to build and extend.
The auto-remediation approach can easily be applied when operating an OpenStack cloud in order to improve reliability. And it&8217;s a good thing, too, because OpenStack has many moving parts that can break. Event-driven automation can take care of a cloud when you sleep, handling not only basic operations such as restarting nova-api and cleaning ceilometer logs, but also complex actions such as rebuilding the rabbitmq cluster or fixing Galera replication.
Automation can also expedite incident resolution by “assisting” engineers with troubleshooting. For example, if monitoring detects that keystone has started to return 503 for every request, the on-call engineer can be provided with logs from every keystone node, memcached and DB state even before starting the terminal.
In building our own self-healing OpenStack cloud, we started small. Our initial POC had just 3 simple automations: cleaning logs, service restarts and cleaning rabbitmq queues. We placed them on our 1,000 node OpenStack cluster, and they run there for 3 months, taking these 3 headaches off our operators. This example showed us that we need to add more and more self-healing actions, so our on-call engineers can sleep better at night.
Here is the short list of issues that can be auto-remediated:

Dead process
Lack of free disk space
Overflowed rabbitmq queues
Corrupted rabbitmq mnesia
Broken database replication
Node hardware failures (e.g. triggering VM evacuation)
Capacity issue (by adding more hypervisors)

Where to see more
We&8217;d love to give you a more detailed explanation on how we approached self-healing of an OpenStack cloud. If you’re at the OpenStack summit, we invite you to attend our talk on Thursday, October 27, 9:00am at Room 112, or if you are in San Jose, CA come to the Auto-Remediation meetup on October 20th and hear us sharing the story there. You can also meet with the StackStorm team and other operators who are making the vision of Self-Healing a reality.
The post Auto-remediation: making an Openstack cloud self-healing appeared first on Mirantis | The Pure Play OpenStack Company.
Quelle: Mirantis

Develop Cloud Applications for OpenStack on Murano, Part 3: The application, part 1: Understanding Plone deployment

The post Develop Cloud Applications for OpenStack on Murano, Part 3: The application, part 1: Understanding Plone deployment appeared first on Mirantis | The Pure Play OpenStack Company.
OK, so so far, in Part 1 we talked about what Murano is and why you need it, and in Part 2 we put together the development environment, which consists of a text editor and a small OpenStack cluster with Murano.  Now let&;s start building the actual Murano App.
What we&8217;re trying to accomplish
In our case, we&8217;re going to create a Murano App that enables the user to easily install the Plone CMS. We&8217;ll call it PloneServerApp.
Plone is an enterprise level CMS (think WordPress on steroids).  It comes with its own installer, but it also needs a variety of libraries and other resources to be available to that installer.
Our task will be to create a Murano App that provides an opportunity for the user to provide information the installer needs, then creates the necessary resources (such as a VM), configures it properly, and then executes the installer.
To do that, we&8217;ll start by looking at the installer itself, so we understand what&8217;s going on behind the scenes.  Once we&8217;ve verified that we have a working script, we can go ahead and build a Murano package around it.
Plone Server Requirements
First of all, let’s clarify the resources needed to install the Plone server in terms of the host VM and preinstalled software and libraries. We can find this information in the official Plone Installation Requirements.
Host VM Requirements
Plone supports nearly all Operating Systems, but for the purposes of our tutorial, let’s suppose that our Plone Server needs to run on a VM under Ubuntu.
As far as hardware requirements, the Plone server requires the following:
Minimum requirements:

A minimum of 256 MB RAM and 512 MB of swap space per Plone site
A minimum of 512 MB hard disk space

Recommended requirements:

2 GB or more of RAM per Plone site
40 GB or more of hard disk space

The Plone Server also requires the following to be preinstalled:

Python 2.7 (dev), built with support for expat (xml.parsers.expat), zlib and ssl.
Libraries:

libz (dev),
libjpeg (dev),
readline (dev),
libexpat (dev),
libssl or openssl (dev),
libxml2 >= 2.7.8 (dev),
libxslt >= 1.1.26 (dev).

The PloneServerApp will need to make sure that all of this is available.
Defining what the PloneServerApp does
Next we are going to define the deployment plan. The PloneServerApp executes all necessary steps in a completely automatic way to get the Plone Server working and to make it available outside of your OpenStack Cloud, so we need to know how to make that happen.
The PloneServerApp should follow these steps:

Ask the user to specify the host VM, such as number of CPUs, RAM, disk space, OS image file, etc. The app should then check that the requested VM meets all of the minimum hardware requirements for Plone.
Ask the user to provide values for the mandatory and optional Plone Server installation parameter.
Spawn a single Host VM, according to the user&8217;s chosen VM flavor.
Install the Plone Server and all of its required software and libraries on the spawned host VM. Well have PloneServerApp do this by launching an installation script (runPloneDeploy.sh).

Let&8217;s start at the bottom and make sure we have a working runPloneDeploy.sh script; we can then look at incorporating that into the PloneServerApp.
Creating and debugging a script that fully deploys the Plone Server on a single VM
We&8217;ll need to build and test our script on a Ubuntu machine; if you don&8217;t have one handy, go ahead and deploy one in your new OpenStack cluster. (When we&8217;re done debugging, you can then terminate it to clean up the mess.)
Our runPloneDeploy.sh will be based on the Universal Plone UNIX Installer. You can get more details about it in the official Plone Installation Documentation, but the easiest way is to follow these steps:

Download the latest version of Plone:
$ wget –no-check-certificate https://launchpad.net/plone/5.0/5.0.4/+download/Plone-5.0.4-UnifiedInstaller.tgz

Unzip the archive:
<pre?$ tar -xf Plone-5.0.4-UnifiedInstaller.tgz
Go to the folder containing the installation script&;
$ cd Plone-5.0.4-UnifiedInstaller

&8230;and see all installation options provided by the Universal UNIX Plone Installer:
$ ./install.sh –help

The Universal UNIX Installer lets you choose an installation mode:

a standalone mode &; single Zope web application server will be installed, or
a ZEO cluster mode &8211; ZEO Server and Zope instances will be installed.

It also lets you set several optional installation parameters. If you don’t set these, default values will be used.
In this tutorial let’s choose standalone installation mode and make it possible to configure the most significant parameters for standalone installation. These most significant parameters are the:

administrative user password
top level path on Host VM to install the Plone Server.
TCP port from which the Plone site will be available from outside the VM and outside your OpenStack Cloud

Now, if we were installing Plone manually, we would feed these values into the script on the command line, or set them in configuration files.  To automate the process, we&8217;re going to create a new script, runPloneDeploy.sh, which gets those values from the user, then feeds them to the installer programmatically.
So our script should be invoked as follows:
$ ./runPloneDeploy.sh <InstallationPath> <AdminstrativePassword> <TCPPort>
For example:
$ ./runPloneDeploy.sh “/opt/plone/” “YetAnotherAdminPassword” “8080”
The runPloneDeploy.sh script
Let&8217;s start by taking a look at the final version of the install script, and then we&8217;ll pick it apart.
1. #!/bin/bash
2. #
3. #  Plone uses GPL version 2 as its license. As of summer 2009, there are
4. #  no active plans to upgrade to GPL version 3.
5. #  You may obtain a copy of the License at
6. #
7. #       http://www.gnu.org
8. #
9.
10. PL_PATH=”$1″
11. PL_PASS=”$2″
12. PL_PORT=”$3″
13.
14. # Write log. Redirect stdout & stderr into log file:
15. exec &> /var/log/runPloneDeploy.log
16.
17. # echo “Installing all packages.”
18. sudo apt-get update
19.
20. # Install the operating system software and libraries needed to run Plone:
21. sudo apt-get -y install python-setuptools python-dev build-essential libssl-dev libxml2-dev libxslt1-dev libbz2-dev libjpeg62-dev
22.
23. # Install optional system packages for the handling of PDF and Office files. Can be omitted:
24. sudo apt-get -y install libreadline-dev wv poppler-utils
25.
26. # Download the latest Plone unified installer:
27. wget –no-check-certificate https://launchpad.net/plone/5.0/5.0.4/+download/Plone-5.0.4-UnifiedInstaller.tgz
28.
29. # Unzip the latest Plone unified installer:
30. tar -xvf Plone-5.0.4-UnifiedInstaller.tgz
31. cd Plone-5.0.4-UnifiedInstaller
32.
33. # Set the port that Plone will listen to on available network interfaces. Editing “http-address” param in buildout.cfg file:
34. sed -i “s/^http-address = [0-9]*$/http-address = ${PL_PORT}/” buildout_templates/buildout.cfg
35.
36. # Run the Plone installer in standalone mode
37. ./install.sh –password=”${PL_PASS}” –target=”${PL_PATH}” standalone
38.
39. # Start Plone
40. cd “${PL_PATH}/zinstance”
41. bin/plonectl start
The first line states which shell should be execute the various commands commands:
#!/bin/bash
Lines 2-8 are comments describing the license under which Plone is distributed:
#
#  Plone uses GPL version 2 as its license. As of summer 2009, there are
#  no active plans to upgrade to GPL version 3.
#  You may obtain a copy of the License at
#
#       http://www.gnu.org
#
The next three lines contain commands assigning input script arguments to their corresponding variables:
PL_PATH=”$1″
PL_PASS=”$2″
PL_PORT=”$3″
It’s almost impossible to write a script with no errors, so Line 15 sets up logging. It redirects both stdout and stderr outputs of each command to a log-file for later analysis:
exec &> /var/log/runPloneDeploy.log
Lines 18-31 (inclusive) are taken straight from the Plone Installation Guide:
sudo apt-get update

# Install the operating system software and libraries needed to run Plone:
sudo apt-get -y install python-setuptools python-dev build-essential libssl-dev libxml2-dev libxslt1-dev libbz2-dev libjpeg62-dev

# Install optional system packages for the handling of PDF and Office files. Can be omitted:
sudo apt-get -y install libreadline-dev wv poppler-utils

# Download the latest Plone unified installer:
wget –no-check-certificate https://launchpad.net/plone/5.0/5.0.4/+download/Plone-5.0.4-UnifiedInstaller.tgz

# Unzip the latest Plone unified installer:
tar -xvf Plone-5.0.4-UnifiedInstaller.tgz
cd Plone-5.0.4-UnifiedInstaller
Unfortunately, the Unified UNIX Installer doesn’t give us the ability to configure a TCP Port as a default argument of the install.sh script. We need to edit it in buildout.cfg before carrying out the main install.sh script.
At line 34 we set the desired port using a sed command:
sed -i “s/^http-address = [0-9]*$/http-address = ${PL_PORT}/” buildout_templates/buildout.cfg
Then at line 37 we launch the Plone Server installation in standalone mode, passing in the other two parameters:
./install.sh –password=”${PL_PASS}” –target=”${PL_PATH}” standalone
After setup is done, on line 40, we change to the directory where Plone was installed:
cd “${PL_PATH}/zinstance”
And finally, the last action is to launch the Plone service on line 40.
bin/plonectl start
Also, please don’t forget to leave comments before every executed command in order to make your script easy to read and understand. (This is especially important if you&8217;ll be distributing your app.)
Run the deployment script
Check your script, then spawn a standalone VM with an appropriate OS (in our case it is Ubuntu OS 14.04) and execute the runPloneDeply.sh script to test and debug it. (Make sure to set it as executable, and if necessary, to run it as root (or using sudo)!)
You&8217;ll use the same format we discussed earlier:
$ ./runPloneDeploy.sh <InstallationPath> <AdminstrativePassword> <TCPPort>
For example:
$ ./runPloneDeploy.sh “/opt/plone/” “YetAnotherAdminPassword” “8080”
Once the script is finished, check the outcome:

Find where Plone Server was installed on your VM using the find command, or by checking the directory you specified on the command line.
Try to visit the address http://127.0.0.1:[Port] &8211; where [Port] is the TCP Port that you point to as an argument of the runPloneDeploy.sh script.
Try to login to Plone using the &;admin&; username and [Password] that you point to as an argument of the runPloneDeploy.sh script.

If something doesn’t seem to be right check the runPloneDeploy.log file for errors.
As you can see, our scenario has a pretty small number of lines but it really does the whole installation work on a single VM. Undoubtedly, there are several ways in which you can improve the script, like smart error handling, passing more customizations or enabling Plone autostart. It’s all up to you.
In part 4, we&8217;ll turn this script into an actual Murano App.
The post Develop Cloud Applications for OpenStack on Murano, Part 3: The application, part 1: Understanding Plone deployment appeared first on Mirantis | The Pure Play OpenStack Company.
Quelle: Mirantis

Develop Cloud Applications for OpenStack on Murano, Part 1: What is Murano, and why do I need it?

The post Develop Cloud Applications for OpenStack on Murano, Part 1: What is Murano, and why do I need it? appeared first on Mirantis | The Pure Play OpenStack Company.
So many apps, so little time.
Developing applications for cloud can be a complicated process; you need to think about resources, placement, scheduling, creating virtual machines, networking&; or do you?  The OpenStack Murano project makes it possible for you to create an application without having to worry about directly doing any of that.  Instead, you can create your application, package it with instructions, and let Murano do the rest.
In other worlds, Murano lets you much more easily distribute your applications &; users just have to click a few buttons to use them.
Every day this week we&;re going to look at the process of creating OpenStack Murano apps so that you can make your life easier &8212; and get your work out there for people to use without having to beg an administrator to install it for them.
We&8217;ll cover the following topics:

Day 1: What is Murano, and why do I need it?
In this article, we&8217;ll talk about what Murano is, who it helps, and how. We&8217;ll also start with the basic concepts you need to understand and let you know what you&8217;ll need for the rest of the series.
Day 2:  Creating the development environment
In this article, we&8217;ll look at deploying an OpenStack cluster with Murano so that you&8217;ve got the framework to work with.
Day 3:  The application, part 1:  Understanding Plone deployment
In our example, we&8217;ll show you how to use Murano to easily deploy the Plone enterprise CMS; in this article, we&8217;ll go over what Murano will actually have to do to install it.
Day 4:  The application, part 2:  Creating the Murano App
Next we&8217;ll go ahead and create the actual Murano App that will deploy Plone.
Day 5:  Uploading and troubleshooting the app
Now that we&8217;ve created the Plone Murano App, we&8217;ll go ahead and add it to the application catalog so that users can deploy it. We&8217;ll also look at some common issues and how to solve them.

Interested in seeing more? We&8217;ll showing you how to automate Plone deployments for OpenStack at Boston Plone October 17-23, 2016.
Before you start
Before you get started, let&8217;s make sure you&8217;re ready to go.
What you should know
Before we start, let&8217;s get the lay of the land. There&8217;s really not that much you need to know before building a Murano app, but it helps if you are familiar with the following concepts:

Virtualization: Wikipedia says that &;Hardware virtualization or platform virtualization refers to the creation of a virtual machine that acts like a real computer with an operating system.&; Perhaps that&8217;s an oversimplification, but it&8217;ll work for us here. For this series, it helps to have an understanding of virtualization fundamentals, as well as experience in the creation, configuration and deployment of virtual machines, and the creation and restoration of VM snapshots.
OpenStack: OpenStack is, of course, a platform that helps to orchestrate and manage these virtual resources for you; Murano is a project that runs on OpenStack.
UNIX-like OS fundamentals: It also helps to understand command line, basic commands and the structure of Unix-like systems. If you are not familiar with the UNIX command line you might want to study this Linux shell tutorial first.
SSH: It helps to know how to generate and manage multiple SSH keys, and how to connect to a remote host via SSH using SSH keys.
Networks: Finally, although you don&8217;t need to be a networking expert, it is useful if you are familiar with these concepts: IP, CIDR, Port, VPN, DNS, DHCP, and NAT.

If you are not familiar with these concepts, don&8217;t worry; you will be able to learn more about them as we move forward.
What you should have
In order to run the software we&8217;ll be talking about, your environment must meet certain prerequisites. You&8217;ll need a 64-bit host operating system with:

At least 8 GB RAM
300 GB of free disk space. It doesn’t matter if you have less than 300 GB of real free disk space, as it will be taken by demand. So, if you are going to deploy a lightweight application then maybe even 128 GB will be enough. It’s up to your application requirements. In the case of Plone, the recommendation is 40MB per site to be deployed.
Virtualization enabled in BIOS
Internet access

What is OpenStack Murano?
Imagine you&8217;re a cloud user. You just want to get things done. You don&8217;t care about all of the details, you just want the functionality that you need.
Murano is an OpenStack project that provides an application catalog, like the AppStore for iOS or GooglePlay for Android. Murano lets you easily browse for cloud applications you need by their name or category, and then enables you to rapidly deploy them to the cloud with just a few clicks.
For example, if you want a web server, rather than having to create a VM, find the software, deploy it, manage IP addresses and ports, and so on, Murano enables you to simply choose a web server application, name it, and go; Murano does the rest of the work.
Murano also makes it possible to easily deploy applications with multiple components.  For example, what if you didn&8217;t just want a web server, but you wanted a WordPress application, which includes a web server database, and web application? A pre-existing WordPress Murano app would make it possible for you to simply choose the app, specify a few parameters, and go.  (In fact, later in this series we&8217;ll look at creating an app for an even more complex CMS, Plone.)
Because it&8217;s so straightforward to deploy the applications, users can do it themselves, rather than relying on administrators.
Moreover, not only does Murano let users and administrators easily deploy complex cloud applications, it also completely manages application lifecycles such as auto scaling-up and scaling-down clusters, providing self-healing and more.
Murano’s main end users are:

Independant cloud users, who can use Murano to easily find and deploy applications themselves.
Cloud Service Owners, who can use Murano to save time when deploying and configuring applications to multiple instances or when deploying complex distributed applications with many dependent applications and services.
Developers, who can use Murano to easily deploy and redeploy on-demand applications, many times without cloud administrators, for their own purposes (for example for hosting a web-site, or for the development and testing of applications). They can also use Murano to make their applications available to other end users.

In short, Murano turns application deployment and managing processes into a very simple process that can be performed by administrators and users of all levels. It does this by encapsulating all of the deployment logic and dependencies for the application into a Murano App, which is a single zip file with a specific structure. You just need to upload it to your cloud and it&8217;s ready.
Why should I create a Murano app?
OK, so now that we know what a Murano app is, why should we create one?  Well, ask yourself these questions:

Do I want to spend less time deploying my applications?
Do I want my users to spend less time (and aggravation) deploying my applications?
Do I want my employees to spend more time actually getting work done and less time struggling with software deployment?

(Do you notice a theme here?)
There are also reasons for creating Murano Apps that aren&8217;t necessarily related to saving time or being more efficient:

You can make it easier for users to find your application by publishing it to the OpenStack Community Application Catalog, which provides access to a whole ecosystem of people  across fast-growing OpenStack markets around the world. (Take a look how huge it is by exploring OpenStack User-stories.)
You can develop your app as a robust and re-usable solution in your private OpenStack сloud to avoid error-prone manual work.

All you need to do to make these things possible is to develop a Murano App for your own application.
Where we go from here
OK, so now we know what a Murano App is, and why you&8217;d want to create one. Join us tomorrow to find out how to create the OpenStack and developer environment you&8217;ll need to make it work.
And let us know in the comments what you&8217;d like to see out of this series!
 
The post Develop Cloud Applications for OpenStack on Murano, Part 1: What is Murano, and why do I need it? appeared first on Mirantis | The Pure Play OpenStack Company.
Quelle: Mirantis